3D Chevron Resin Art
Posted by sarah@brodsolutions.com BigCommerce on Jul 9th 2020
Learn How to Make 3D Resin Art
Have you ever thought, “Oh no, I can’t paint that…I can barely draw a stick figure”? Think again! You CAN paint this, and I’ll show you exactly how! Come join me while I teach you the easiest way to create this awesome layered, chevron design…no stick figures required.
Materials Used:
- 10×20 cradled wooden panel
- Frog Tape painter’s tape
- Table Top Pro epoxy
- Art Pro epoxy
- Disposable foam brush
- Medium/Large paint brush
- Culinary torch
- Embossing heat gun
- Rubbing alcohol and a soft cloth
- Arteza acrylic colors – Phthalo Green, Titanium White and Burnt Umber
- Artist’s Loft white gesso
- Earl Lube Pour fluid pouring medium
- Plastic spreader
- 120 grit sponge sander
- Paper template/guide
- Bosch random orbital sander
I wanted to create a project that showed off the depth you can get from layering epoxy. I started sketching some different ideas to get the creative juices flowing. Ultimately I picked the chevron and ended up switching up the colors from my original sketch.
Here's the Full Tutorial on Creating this 3D Resin Art
Step Two: Mix and Swatch Your Paints
While the epoxy cures, let’s swatch some paints! Most acrylic paints will dry slightly darker than the color you see in the tube. Doing a small test or swatch of the possible project colors is a great way to get an idea of what colors will or won’t work for your painting. With this project I knew I wanted to have a monochromatic gradient, so I made sure to mix the colors with graduating amounts of titanium white to see which looked best.
Step Three: Paint the Base Layer
After the back of the panel is cured, remove the old tape and add new tape to the bottom edge for easy epoxy drip removal at the end of the project. Mix a small amount of brown paint with a large amount of white paint to create a light, sandy brown color. Once the desired color is achieved, mix in a bit of fluid pouring medium to extend the working time of the paint and help soften the brush strokes. Brush on two layers of your light brown to the left side of your panel. Make sure that all exposed wood is covered, including the sides of the panel. When dry, use a white acrylic gesso to prime the entire right side of the panel, making sure all exposed wood is painted. Let the base layer dry completely before moving on to the next step.
Step Four: Pour Resin Flood Coat
Use a clean, dry paint brush to sweep away any lingering dust from the top of your painted panel. Pour your mixed ArtPro epoxy onto the panel and spread evenly. For all remaining steps, I will be using the ArtPro epoxy system. With a gloved hand, make sure all sides and edges are coated. Pop any bubbles with your torch, cover panel and let cure. Once cured, sand the layer with a 120-grit sponge sander and wipe clean with a soft cloth and rubbing alcohol.
Step Five: Paint the Design
Before painting, plan out what you want your design to look like and how you will achieve it. For this piece I created a simple chevron/arrow pattern. Using a ruler or straight edge, pencil out your design on paper and cut it out. Use this template as your guide for placing the tape. Create the darker brown color by mixing equal parts brown and white paint and then adjusting by adding more white or brown. Thoroughly mix the custom color, add your fluid medium and apply one to two coats of this mixture to the desired area to create your design. While the paint is still wet, gently and carefully remove the tape and let the panel dry completely before moving on.
Step Six: Rinse and Repeat
Repeat steps 4-5 until the whole panel is covered in the chevron pattern.
Step Seven: Finishing Touches
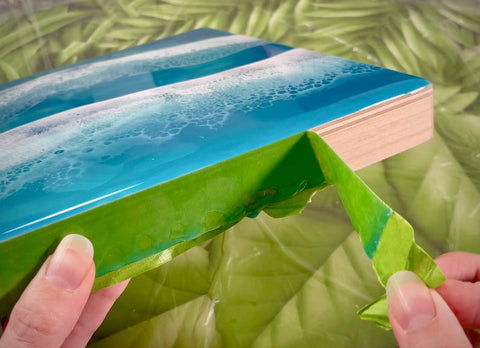
Once the painting is completed, it’s time to finish up the back. Gently flip the panel over on a soft workspace. Using an embossing/heat gun to soften the resin drips, remove all remaining tape from the bottom of the panels. Smooth any rough edges with an orbital palm sander and wipe clean for a perfect finish!
Don’t forget to sign your beautiful artwork! If you felt inspired by this tutorial to create a piece of your own, please post and tag @masepoxies on Instagram for a chance to be featured! We love seeing you explore new ways to resin! Stay creative and happy crafting!