null
Skip to main content

Abstract Epoxy Halloween Paintings

Oct 13th 2021

Learn How to Create a Spooky Resin Painting!

Throw your perfectionism out the window and let the resin flow!

Stuck in a creative rut? One of our best tips for this, is to create something that’s abstract, and then turn it into something real! We’re taking abstract resin blobs and seeing what sort of Halloween theme we can pull from them! This tutorial will definitely give your creativity a jump start! We can’t wait to see what you pull out of your brains with this one.


Materials Used:

  • MAS Epoxies Art Pro or Table Top Pro 
  • Liquitex Acrylic Ink (in an assortment of Fall colors)
  • Vinyl Cutter and Vinyl (optional)
  • Painters Pyramids
  • (2) 8” Wooden Panels
  • Measuring Cups 
  • Popsicle Sticks
  • Weight Scale
  • Scissors
  • Dixie Cups
  • Respirator
  • Silver Flakes
  • Gloves
  • Paper Towels
  • Acrylic Paint
  • Paintbrush
  • Level
  • Tape

Here are the epoxy systems that work great with this project!


For this project, we will be using the MAS Art Pro epoxy system. This system has been called the best epoxy resin for art with its low viscosity, 1:1 mix ratio, 60 minute working time and improved UV resistance. Art Pro is an easy to use epoxy that allows users to create beautiful, high gloss pieces of art resin and can be combined with pigment powders, alcohol ink and acrylic paints.

Sold out

Sold out


Check out the process video!


Here's the full tutorial!


Step 1: Prepping the wooden panels

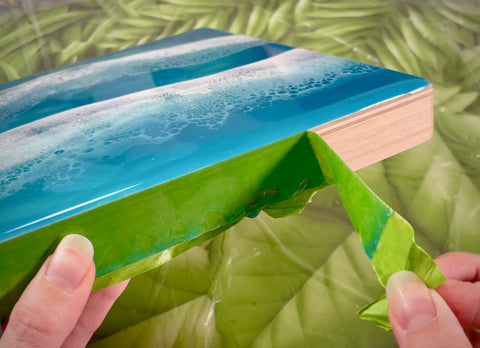
Before we begin pouring the epoxy, we first need to protect the back of the panels from resin drips. Use your favorite brand of painter’s tape to mask off the back edges and for more information on taping, check out our Epoxy Basics: Taping Tips for Clean Edges blog post! Once the edges are taped, set your panels on painter’s pyramids to lift them off your work surface and check to make sure they are level.


Step 2: Mixing the epoxy

For this project we will be using MAS Art Pro for it’s longer working time and improved UV resistance. Mix up a batch of the clear epoxy and split it into 4 separate cups. Color each cup of epoxy with a pigment of your choice. We used an orange, black, purple, and silver glitter for some spooky contrast.


Step 3: Creating abstract layers

Using the 4 pigmented epoxies, pour the resin however you like onto the panels. Just let go and have fun with it! Don’t think too much about where each color is going and try to not “control” the epoxy. Once you’re happy with the first layer, let the epoxy cure for 24 hours before repeating steps 2 and 3. For our panels, we poured a total of 3 colored epoxy layers before moving on to the next step.


Step 4: Time to use your imagination

Look at your pieces and see if you can imagine anything realistic from the abstract shapes. Once you come up with something, use acrylic paint and/or vinyl to make your paintings come to life. For this project we painted orange acrylic pumpkins on one panel and used vinyl to create friendly ghosts on the other.


Step 5: Finishing touches

Once you’re happy with your abstract designs, it’s time to add a final layer of clear epoxy to seal in the beautiful paintings! Make sure to cover the pieces with a box to protect them from dust, hair, and bugs during this final curing. In 24 hours, use a heat gun to warm up the epoxy and tape adhesive for a super easy tape removal. Sand down and rough edges and sign your masterpiece!


If you felt inspired by this tutorial to create an abstract piece of your own, please post it to your social media and tag @masepoxies + #masepoxies on Instagram for a chance to be featured! We love seeing you explore new ways to resin! Stay creative and happy crafting!


Thank you for joining us on this Halloween adventure!