null
Skip to main content

DIY Foil Coaster Set

Oct 22nd 2020

Learn How to Create This Fun Coaster Set!


Materials Used:

  • Table Top Pro epoxy
  • Aluminum Foil
  • Wooden coaster blanks
  • Frogtape painter’s tape
  • Black acrylic paint
  • Pigment powder and paste
  • Bosch palm sander
  • Culinary torch
  • Craft knife
  • Starbond medium adhesive with accelerator
  • Adhesive cork backing
  • Wood burning tool

Check Out the Video Tutorial:

Table Top Pro Epoxy for epoxy resin table
Sold out

Here's the Full Coaster Set Tutorial

Step 1: Prepping the coaster

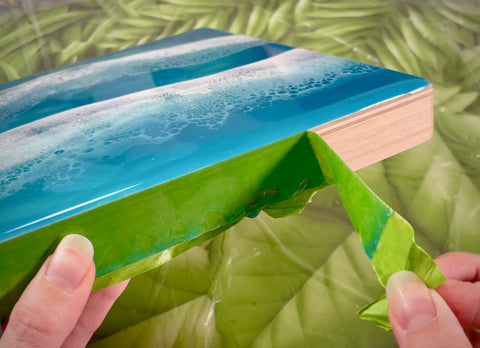
Before getting to the fun part of this project we need to prep the coasters. Mask off the back of the coasters with your favorite brand of painter’s tape, making sure to firmly press down the edges. Crinkle aluminum foil and glue it to the wooden coaster, being careful to cut off any excess with a craft knife. Using painter’s tape, mask off the sides of the coasters to create a boundary for the epoxy.

Step 2: First layer of epoxy

Combine pigment powder, high flow acrylic or alcohol ink with Mas Epoxies Table Top Pro epoxy. Pour a small amount of your pigmented epoxy onto the crinkled foil and spread evenly, leaving some of the high ridges of the foil visible. Let this layer cure completely before removing the tape from the edges.

Step 3: Sanding the coasters

I used two different methods for sanding these coasters. We will start with the purple one. Using a palm sander, I sanded down the top of the coaster till it was completely smooth. This method will tear out most of the foil, leaving you with some large and small voids that will need to be filled in a later step. Make sure to use tweezers to pick out any loose foil shards. For the teal coaster, I just sanded the edges of the piece, making sure that there were no sharp spots. Clean off the coasters with rubbing alcohol and a soft rag before moving on to the next step.

Step 4: Second layer of epoxy

We will start with the purple coaster. Using black pigmented epoxy, fill in all of the gaps, making sure that there are no large air pockets. Set this piece aside and let it fully cure while you pour a clear layer of epoxy over the teal coaster. The pieces must be fully cured before moving on to the next step.

Step 5: More sanding

Sand both the top and sides of the coasters until they are smooth and level. Clean the coasters with a soft rag and rubbing alcohol.

Step 6: Painting the edges and final epoxy pour

Using black acrylic paint, carefully paint the bottom half of the coaster to hide the wooden coaster base. Once the acrylic is dry, add the final layer of clear epoxy to seal everything in and create a beautiful shine.

Step 7: Finishing touches

Last but not least, let’s give the back of the coasters some love! Peel off all remaining painter’s tape and paint the back of the coaster black to match the edges. Adhere the adhesive cork backings and sign your name (I used a wood burning tool).

If you felt inspired by this tutorial to create a coaster set of your own, please post and tag @masepoxies #masepoxies on Instagram for a chance to be featured! We love seeing you explore new ways to resin! Stay creative and happy crafting!


Thank you for joining us on this foil DIY adventure! To get started on your own fun coaster set, check out the MAS Table Top Pro system used in this tutorial!