
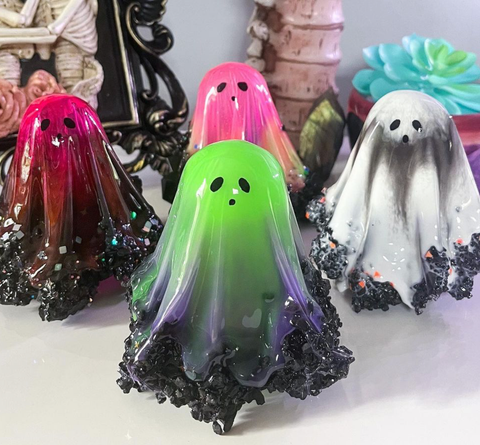
Spooky season is just around the corner! If you haven't started decorating yet, here is your reminder to begin the hauntingly, awesome process of SPOOKIFING your home! Continue reading to find out how Jessica Abella creates these adorable ghostly resin decorations.
Here's a Little More About Jess
"Hi, I'm Jessica! I’m a part-time artist hoping to transition into making art full time one day. I graduated with my BFA in photography in 2014. After graduation, I branched out and tried experimenting with different mediums to express myself. Epoxy brought a whole new process into my work. As a photographer, most things are visual and then manipulated later on in the editing process. However, with epoxy you can create that manipulation with your own hands. Being able to produce movement and texture is really what sparked my interest in the first place, the combinations are unlimited!"
Materials Used
- MAS Epoxies Table Top Pro
- Paper plate
- Plastic wrap
- Mini cups
- Beads
- Small round object (like a bouncy ball)
- Tape
- Pigments
- Paint marker
- Heatgun
Check Out Jessica's Video Tutorial
Step 1: Source Your Materials
Find a plate with a large surface area. You will be pouring resin into the plate, so this will define the size of your ghosts. I find paper plates to be the easiest. You will also need some mini cups, plastic wrap, and any type of small, rounded object. I personally use plastic Halloween eyeballs I got from the dollar store. You can use bouncy balls or Styrofoam balls as well.
Jessica's Pro Tip: "For the plastic wrap, I suggest purchasing a good, brand name. I use Reynolds because I find it to be more durable than other store brands. The quality is important because you will be pouring resin directly on top of the plastic and then removing the plastic wrap from the plate by grabbing the edges. Therefore, you want it to be as durable as possible."

Step 2: Prepare Your Ghostly Mold
First, tape the small ball to the top of the cup. This is your model that you will be using to create the shape of a ghost. You want to make sure it’s not too high or low from the table because it will affect your drapery. I usually use 2 mini cups stacked on top of each other.

Step 3: Aligning The Beads
Find any type of small pebbles, beads, or crystals. (I prefer using pebbles or beads. You will see why later!) You can even use something finer like sand or glitter. However, I do not suggest using fire glass or anything sharp because you will have to remove the plastic wrap later and you don’t want to get poked or cut by sharp edges. Now it’s time to align your material around the edge of the plate.

Step 4: Pouring The First Layer of Epoxy Resin
Pour a thin layer of MAS Epoxies' Table Top Pro resin onto the plastic wrap on the plate. You will be filling in the space you left in the middle allowing just the edges to reach the beads. You are creating a barrier, so the resin won’t drip off when you go to move it to your model. This is why I choose to use something a little thicker on the bottom. However, you don’t want to use something that’s too heavy because it will weigh down the resin and cause the top of your ghost to become fragile.


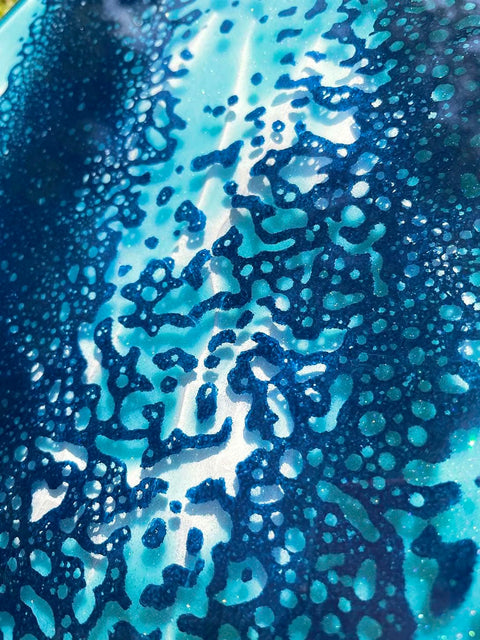
Jessica's Pro Tip: "Add a splash of spooky! After you pour the resin, you can decorate it with glitter or make designs with different colors! Let your spookiness lead the way!"
Step 5: Let's Talk About Timing
This is the hardest step, but don’t worry YOU got this! Depending on the type of resin you use, you will have to figure out what time frame is best for you to transfer your sheet of resin onto the model. I strictly use Mas Table Top Pro resin for this project because of the cure time. The reason why this step can be difficult, is because there’s quite a few different variables that effect the cure time. For example, the temperature of the room, the amount of resin used, and the materials you’re putting into the resin. When you mix paint into resin it becomes slightly thicker, making the resin cure faster. Rather than ink, which I find usually slows down the cure time, due to the alcohol in it. So, for this step you are going to be babysitting your sheets and figuring out the best time to transfer them. You want to move it right after it finishes the liquid stage, where it’s still moveable, but not completely solid. You can pour two different ghosts at the same time and maybe you put a little extra resin in one plate. That plate will start to cure faster, so continue checking each plate. In a room that’s 80 degrees, it usually takes about an hour and a half to transfer it. During the colder months, when the studio is 70 degrees, it takes about 2 hours. It really depends on the temperature, so you will be constantly checking in on your sheets. So don’t forget to set those timers!!
Step 6: Transferring The Resin to Your Mold
Once they’re at the perfect cure time, you will pick up the plastic wrap from the edges. Make sure to wear gloves! They will be super sticky at this stage (a great way to tell if it’s ready btw). Once you have it in your hands, be careful not to get your beads all over the middle because they will stick. You’re going to place the sheet of epoxy on top of your model and play around with the drapery. If you transferred it at the right time, it’ll start to form organically. If you pulled it off too late, and the middle of your sheet has started to cure fully, you’re going to have a tough time. If you're lucky, you can use a heat gun to heat it up a little bit, but mostly you’re not going to be able to get the desired shape. Usually, when this happens to me (which it does) I turn it into a cool bowl by letting it cure on a cup! If you pulled the resin off too early, you’ll see the resin start to drip down past the pebbles and start pooling onto your table. While it might look cool, this takes away from the resin on the top, which makes it very fragile and sometimes see through. This is why checking on your sheet is so important. If you have fails, don’t be too hard on yourself! Try to figure out what went wrong and adjust your timing or materials. You got this!!

Step 7: Demolding The Ghosts
Let your ghastly ghosts cure for at least 12 hours before removing the plastic wrap from the inside. It usually comes off easily when it's fully cured. If not, hit it with a heat gun and the plastic will melt off! Make sure to wear a respirator!

Step 8: Make Them Come ALIVE!
Now it’s time to draw the spooky faces!!! Whatever ghostly face you desire. You can also place a battery-operated tea light under the ghosts to watch them glow at night! Or use glow in the dark paint to make them glow all on their own.


Thank you for coming on this SPOOKY adventure with us! I hope you enjoyed!


Comments (0)
There are no comments for this article. Be the first one to leave a message!