DIY Resin Tray Makeover
Posted by sarah@brodsolutions.com BigCommerce on Aug 31st 2020
How to Create a Functional and Fun Resin Tray
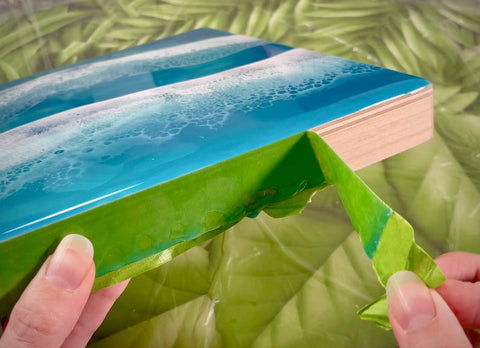
Whether you prefer an ice-cold margarita or a hot cup of tea, this glittering blue mosaic tray makes for a show stopping presentation. This DIY tray is a super easy and fun way to add a little bit of whimsy to your daily routine.
Materials Used:
- Wooden tray
- Wooden shapes
- Confetti glitter
- Extra fine glitter
- Table Top Pro epoxy
- Gorilla Glue
- Culinary torch
- Artist’s Loft acrylic colors – Titanium White, Light Blue, Turquoise and Aqua Green
- 120 grit sponge sander
Here's the Full Tutorial on Creating this Stylish Resin Tray
Step One: First Glittering Layer
Combine a healthy amount of chunky confetti glitter to your mixed epoxy (set aside a splash of glitter-free epoxy). Pour your confetti epoxy into the tray and spread evenly. Using your gloved hand, massage the glitter-free epoxy onto the inner sides on the tray. Pop remaining bubbles with your torch and let this layer cure completely.
Step Two: Sand Smooth
Once your first layer has cured completely, you might notice some sharp pieces of confetti glitter poking out of the cured epoxy. Use a 120 grit sponge sander to smooth and level off this foundation layer. Wipe clean with a soft cloth and rubbing alcohol.
Step Three: Painting the Wooden Shapes
This step can be a bit tedious, so I recommend setting up shop in front of a fun movie or asking a friend to lend a hand! Using your desired color pallet, paint one side (including the edges) of the wooden shapes. I wanted to create a gradient effect using a variety of blues and white. Have fun with your color pallet! I would love to see a fall themed color scheme with gold, yellow, orange and reds or even a pastel rainbow pallet with bright pops of color!
Step Four: Planning and Gluing
Once your painted wooden shapes are completely dry, it’s time to plan your pattern. Place the shapes in an interesting design. It took a lot of moving pieces around to find the pattern that appealed to me. When you are happy with the arrangement, use your favorite brand of glue to adhere the shapes to the confetti epoxy layer. Let the glue dry completely before moving on to the next step.
Step Five: Final Epoxy Coat
I wanted to add a touch more sparkle to this piece. Using an extra fine glitter, add just a pinch to your mixed epoxy. Pour this mixture over your shapes to encapsulate them into your tray design. Use a torch to pop any bubbles and let cure. You may need to repeat this step to ensure that your surface is smooth and level over the wooden shapes.
Don’t forget to sign your beautiful artwork! If you felt inspired by this tutorial to create a piece of your own, please post and tag @masepoxies #masepoxies on Instagram for a chance to be featured! We love seeing you explore new ways to resin! Stay creative and happy crafting!
Thank you for joining us on this glittering resin tray makeover! To get started on your own terrific tray, check out the MAS Table Top Pro system used in this tutorial!