null
Skip to main content

DIY Spooky Resin Coasters

Oct 18th 2022

Learn How to Create a Spooktacular Coaster

Whether you’re a dentist looking for the perfect coaster to set your drink on or if you’re a lover of the spookier things in life, this DIY spooktacular resin coaster is for you! Check out the full tutorial below, to learn how to create this conversation starter for your home or office.  


Materials Used:
  • Table Top Pro epoxy

  • Trufit Customs’ photo polymerized resin dental molds
  • DecoArt acrylic paints – True Red, Peony Pink, and Titanium White
  • Silicone molds
  • Extra fine glitter
  • Black Diamond Pigment Powder – Black Onyx
  • Culinary torch
  • Craft knife
  • Bear Woods Supply Company rotary tool
  • 120 grit sponge sander
  • Monster liquid latex
  • Starbond medium adhesive with accelerator
  • Adhesive cork backing
  • Wood burning tool

Sold out

Sold out


Here's the Full Tutorial on Creating this Spooky Coaster

Step One: Cleaning the teeth

For this coaster we will be using a set of dental molds to cast into the epoxy. Use a rotary tool to grind down any rough edges on the teeth. Once the surface is smooth, brush off the remaining dust and wipe down with rubbing alcohol to insure there is no residue. (Use an old toothbrush if you want to stay on theme!)

Step Two: Painting the details

Using a mixture of white, pink and red acrylic, paint the base layer of the gums. It is totally fine if you get some color on the teeth, we will take care of that later. When the base layer has dried, use a darker shade of pink to add shading around the teeth. Blend out this darker color with a soft clean brush. When the pink has dried completely, use a craft knife to scrape and peel off any excess pink from the teeth. (This part gave me major dentist vibes!) After giving the teeth a thorough cleaning, carefully paint the teeth white. For a more natural white, try adding a touch of yellow or tan to bring down the brightness.

Step Three: Casting the teeth

Once your Table Top Pro epoxy is properly mixed, pour the epoxy into a spare mold and pop any visible bubbles with a torch. This insures that the mold used for the casting will not melt from the heat of the torch. Once the bubbles are popped, pour a thin layer of epoxy into your desired mold. Let’s add our teeth! Using a popsicle stick, gently spread a layer of epoxy into the deep crevasses of your item that you will be casting. This will help those pesky air bubbles not get trapped in the cracks. Arrange your objects and let cure. Continue pouring thin layers of epoxy and letting them cure, until the items are covered. I added a bit of extra fine glitter and topped the coaster off with a black layer to give it a fun base color.

Step Four: Unmolding and sanding

When you are satisfied with the amount of epoxy layers and they have cured completely, gently peel the mold off of your resin coaster. You might have seen in the video tutorial that parts of the mold stuck to the coaster. I was using a very old mold that was previously damaged. If you have chunks of your mold stuck to your coaster, do NOT fear! We can fix it! Using a rotary tool, sand off any imperfections and give the top and sides of the coaster a once over with a sponge sander. Make sure to wipe the coaster clean before moving on to the next step.

Step Five: Masking off edges

To protect the back of your coaster from epoxy drips, use a layer of liquid latex to mask off the edges. I suggest using a disposable tool, like a popsicle stick, to paint on the latex since it is very hard to get off of paint brush bristles (I learned this the hard way). Let the latex completely dry before moving on.

Step Six: Pouring the final epoxy layer

Slowly pour your epoxy onto the coaster and spread evenly with a popsicle stick. Pop any visible bubbles with a torch, cover to protect your project from dust, and let cure.

Step Seven: Finishing touches

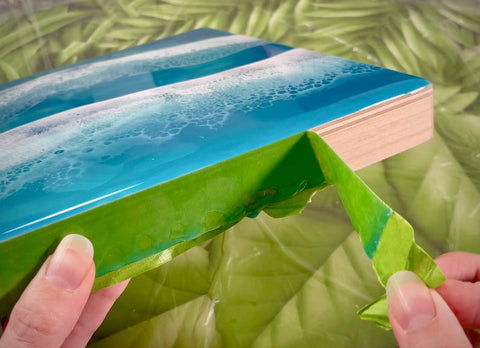
Peel off the liquid latex and epoxy drips from the back of the coaster. This step is SO satisfying! You might need to lightly sand the edges if there are any sharp spots. Once your coaster is shining and beautiful, glue on the cork backing and let dry.

Don’t forget to sign your beautiful artwork! I used a wood burning tool to burn my signature into the cork. If you felt inspired by this tutorial to create a piece of your own, please post and tag @masepoxies #masepoxies on Instagram for a chance to be featured! We love seeing you explore new ways to resin! Stay creative and happy crafting!


Thank you for joining us on this spooky DIY adventure! To get started on your own spooktacular coaster, check out the MAS Table Top Pro system used in this tutorial!