null
Skip to main content
Epoxy Resin and Walrus Oil Serving Tray

Epoxy Resin and Walrus Oil Serving Tray

Posted by Hailey Nolin on Aug 22nd 2021

How to Make an Ocean Resin Serving Tray with a Walrus Oil Finish

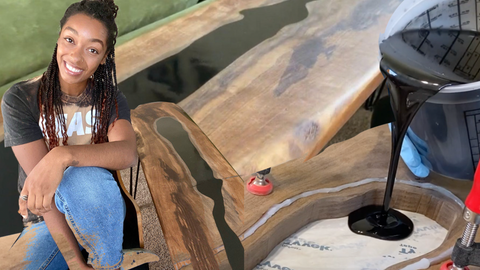
In honor of our Walrus Oil x MAS Epoxies giveaway, we wanted to showcase how we use our products together in tandem on many of our in house creative projects! In this tutorial and YouTube video, Hailey Nolin from @artisthaileynolin uses our MAS TableTop Pro epoxy to paint an ocean wave onto her current lived-in tray! Once the resin dries, she walks you through how to seal the exposed wood using the Cutting Board Care Kit by Walrus Oil. If you haven’t already, go enter to win our HUGE Walrus Oil x MAS Epoxies prize pack HERE!


Materials Used:


Check Out the Full Video Tutorial:


Step 1: Set up and prep

Make sure that your heat gun is plugged in and put your safety equipment on. Start by using the paste wax to seal off the back of the wood so that the resin drips come off easily. After prepping the back of the board, set the wood on painter's pyramids. The pyramids allow the resin to not pool around the wood. At this time, make sure that your board is level so the resin doesn’t slide to one side.


Step 2: Measure and mix the epoxy resin

You will now mix parts A and B together of MAS Epoxies TableTop Pro for 3-5 minutes or until you see no more striations in the epoxy. Bubbles are normal! Separate the epoxy into two empty cups so that you can tint one cup with blue pigment and one cup with white pigment. Leave a small amount of clear epoxy in the original cup, since we will come back to that later.


Step 3: Pigment and pour

Mix the epoxy and pigment together until homogenous. This means that you will not see any clumps of white or blue pigment. We recommend stirring for 2 minutes each. Start pouring your blue resin. Spread the blue resin until it is covering all of the wood area that you want covered to be the “water”. Keep in mind that this serving tray will only be used to serve food on the exposed wooden area, not on the area painted with resin.


Step 4: Creating epoxy resin waves

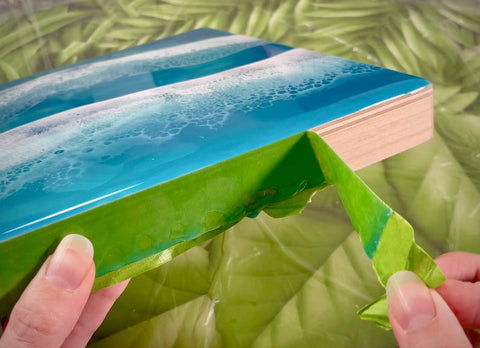
Pour a clear resin line in front of the blue portion. This will be where the blue meets the white of the wave. See the video to fully understand where this line should go. Next, pour a thick line of your white pigmented epoxy in front of the clear line you just poured. Turn your heat gun on high. Hold it at a 30-degree angle and slowly push the white resin back into the blue so that it skims over the top and then breaks up, creating cells which is also known as lacing. Once you have the desired look, you can turn your heat gun off and let your piece set up for a while until the epoxy reaches it's gel time.

Step 5: Pop the bubbles

Bubbles will start rising to the surface, so you’ll want to pop them using your butane torch. Do this by turning your torch on and waving it back and forth across your piece about 2 inches away from its surface. (See the video for exact hand motion.) After the bubbles have been popped, cover your board with a box, if you have one available, to protect it from dust, hair and insects. Now it's time to cure! You should let it dry a minimum of 24 hours before the next step.


Step 6: Removing the resin drips

Since we waxed the back of the wood, removing the resin drips will be a piece of cake! This can be done by flipping the board over onto a microfiber cloth or towel (to avoid scratching) and warm up the drips using a heat gun. They should peel off nicely since wax repels the resin, but if they need a bit more convincing, you can use a blade to scrape them off. Sand down any remaining drips (do this outdoors wearing protective gear). Start at a low grit to knock down all the harsh edges then switch to a higher grit which will smooth out the wood.

Step 7: Oiling the wood

Using the Walrus Oil cutting board care kit, you will use their Cutting Board Oil to seal the wood. Use the towel provided and follow the instructions on the container. After the oil sets up, you can add their wood wax for extra protection and to get a nice finished look. You are now ready to use your serving tray!

This is a great project to try out if you are new to resin, epoxy oceans, or wood wax! We’ve linked all of the supplies that you can get from our website above in the ‘Materials’ section.

Money Saving Tip: Use a serving tray that you already have in your kitchen!


If you try this tutorial out, be sure to use the hashtag #MasEpoxies and tag us at @masepoxies so that we can go check it out! While you’re at it, go enter our MASSIVE Walrus Oil x MAS Epoxies prize pack giveaway HERE!


Sold out