null
Skip to main content
Faux Marble Resin Pour

Faux Marble Resin Pour

Posted by Kelly Johnson on Jan 22nd 2023

Easy and Fun Resin Valentine's Day Gift!


Hey hey heyyyy it's Kelly here! Have you ever wanted to create DIY marble or granite with epoxy resin, but you were too intimidated? Well do I have the tutorial for you!! Using the “dirty pour” method of epoxy resin pouring, you can create the beautifully organic texture of stone and it is SO SIMPLE! I promise you…you’re going to love this Valentine’s Day craft project!


Materials Used:

  • MAS Epoxies’ Art Pro and Table Top Pro
  • MAS Epoxies’ mixing cups and sticks
  • Wooden heart
  • MAS Epoxies’ Resin Ocean Art White Pigment
  • Artist’s Loft acrylic paint – Titanium White, Deep Red, Old Gold, and Light Magenta
  • Decoart acrylic paint – Peony Pink
  • Assorted mica powders
  • Frogtape painter’s tape
  • Wagner heat gun
  • Culinary torch
  • Cotton swab
  • Rubbing Alcohol
  • Sponge sander and palm sander
  • Painter’s pyramids
  • Posca paint pen
  • Hanging hardware and hammer

Table Top Pro Epoxy for epoxy resin table
Sold out

Art Pro Epoxy
Sold out

Sold out

Stop Scrolling! Check out the video tutorial!


Let's Get Crafting!


Step 1: Prepping the wooden panel

Before we begin painting, let’s make sure that the back of our heart panel is masked off to protect it from errant paint and resin drips. For this step, place your favorite brand of painter’s tape around the back edge of the heart. Flip the panel over and trim off the excess tape with a craft knife. If you’re a messy maker (or an over achiever), feel free to tape off the remainder of the back panel with a less expensive tape (if you have some available). Use a popsicle stick to firmly press down the tape around the edge. Now it’s time to prime the panel with a nice, bright white acrylic paint. Let this layer dry completely before moving on to the next step.


Step 2: Prepping the epoxy resin

For the first epoxy layer, I wanted to use a system with a quicker working time so that the epoxy will have less time to move and flow during the curing process. Because of this, I chose MAS Epoxies’ Table Top Pro which has a 30 minute working time, for this project. It’s now time to separate the mixed epoxy into multiple cups. I used 5 different colors AND left a little bit of the clear epoxy in the mixing cup, to use in a later step. Once you portioned out the epoxy, add a small amount of pigment into each cup and mix thoroughly. I was going for a semi-opaque appearance. If you want to add a little bit of shimmer to your piece, you can stir in a scoop of metallic mica powder into each color.

Pro Tip: Mix and measure more epoxy resin than you think you will need. Have some shallow molds or another panel on standby just in case you have any extra epoxy resin left over.


Step 3: The dirty resin pour

One of my favorite and easiest pouring techniques to do, is the “dirty pour”. With this style of pouring, you add all of the colors into one cup and then pour it onto your piece. In any order, start alternating pouring each of your colored epoxy resins into one cup. Once you have enough resin to cover your entire piece, set the separate cups aside to make room for the fun! Before we get to the fun part, grab the clear epoxy we saved from the previous step, and spread a thin coat onto the heart. This clear layer will help the colors flow a bit more easily. While the clear epoxy is still workable, it’s time to do the “dirty pour”! In one fluid motion, pour the colored epoxy onto the heart. I poured in a swirly, circular pattern, but you can have fun with it and get creative! At this point, you will see some bubbles so feel free to grab your torch and pop them (while your gloved hands are still relatively clean). Carefully lift your heart and slowly tilt it back and forth to move the colored epoxy around on your piece. I tried to cover all of the edges with the colored epoxy but ended up painting over them in a future step…so it’s your call! Pop any bubbles with your torch, cover the piece with a box to protect it from dust, and let fully cure.

Step 4: Perfecting the edges

This step is optional! If you’re happy with how your design is, you can stop here and move on to step 6 but if you want to add some more detail, now’s the time! Sand the top and sides of the heart with a sponge sander (or any sandpaper you have available). This will give the cured epoxy some tooth for the next layer to adhere to. Clean the heart with a soft cloth and rubbing alcohol and let dry. For the edge of my piece, I wanted to mix up a darker pink with two acrylic paints. You can get creative with this color choice! I also think that black or a contrasting color would look gorgeous! Add multiple layers of the acrylic paint to the sides of the heart. Once the paint is dried, use a cotton swab dipped in rubbing alcohol to clean off any mistakes and to perfect the top edge.


Step 5: Adding a perfect topcoat

For the topcoat of this piece, I wanted to use a system that had added UV protection and I wasn’t in a time crunch so a longer working time was totally fine. Because of this, I chose MAS Epoxies’ Art Pro that has added UV protection and a 60-minute working time. After properly measuring and mixing parts A and B, pour the epoxy resin onto the piece and spread evenly. Pop any bubble with a torch, cover the piece to protect it from dust, and let fully cure.


Step 6: The finishing touches

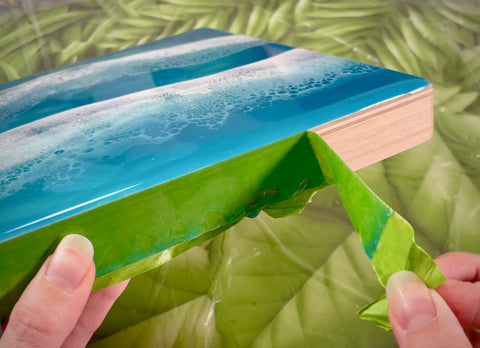
For easy tape removal, use a heat gun to warm up the epoxy that has formed drips on the painter’s tape. Carefully remove the tape and use a palm sander to smooth down any sharp portions. Attach your hanging hardware and don’t forget to sign your beautiful piece!


After following these 6 easy steps, you will be left with a one-of-a-kind art piece that will be perfect for your Valentine’s Day décor! If you felt inspired by this tutorial to create a piece of your own, please post and tag @masepoxies on Instagram for a chance to be featured! We love seeing you explore new ways to resin! Stay creative and happy crafting!


Thank you for following along on this fun DIY marbled heart painting!