null
Skip to main content

Festive Fall Wreath

Oct 18th 2022

Learn How to Make DIY Fall Epoxy Decor!

Winter is right around the corner but let’s not forget about this beautiful fall season! Join us while we create a DIY fall wreath that will be perfect for your Autumn decorations. If you have never made resin home decor, this is the project for you! Check out the FULL tutorial below to get started on your own piece today! Don’t miss out on the FREE Falling Leaves PNG bundle pack to use with your next MAS epoxies project!


Materials Used:

  • Table Top Pro epoxy
  • 6 Falling Leaves PNG Bundle Pack
  • Wooden wreath panel
  • iPad Pro with the Procreate app and Apple Pencil
  • Cricut Explore Air 2
  • Variety of vinyl with application tools
  • Brown, red, orange, yellow, light green and dark green acrylic paint
  • Brush on gloss varnish
  • Sea sponge and a course pouncing brush
  • Toothpick
  • Posca gold paint pen
  • 120 grit sponge sander
  • Bosch palm sander
  • Heat gun for easy tape removal
  • Craft knife and scissors
  • Culinary torch
  • Painter’s tape
  • Burlap ribbon
  • Hot glue gun and extra hot glue sticks
  • Dowel or pencil and plastic scraps
  • Wire with wire cutters
  • Gorilla glue

Sold out

Sold out

Check Out the Video Tutorial:


Here's the Full Fall Wreath Tutorial

Step 1: Creating the custom Cricut vinyl stickers

For this project I wanted to create some fun falling leaves for the main portion of the wreath. I used the Procreate app and an Apple Pencil to draw the digital art designs. Don’t worry if you don't have time to create your own Procreate art, we did the work for you! You can skip this step and click the link to download the entire Falling Leaf PNG Bundle Pack for FREE! Load the images into your vinyl cutting machine and you’re ready to go! If you do not have a Cricut or any sort of vinyl cutting machine, print the images on to computer paper and trace them onto tissue paper. Lay the tissue paper image onto your piece and trace over the lines with a sharpie. The sharpie will transfer through the tissue paper and onto your piece so you can fill in the design with acrylic paint.

Step 2: Metallic leaf Sticker layer

Peel and stick the metallic vinyl cut outs to the wreath making sure to cover all of the exposed wood. Once you are happy with the layout, flip the panel over and trim off the excess stickers with a craft knife. Use your favorite brand of painter’s tape to mask off the edges and back of the wreath. Make sure to firmly smooth down the tape to ensure for a tight seal. Did you know that you can add resin under or over vinyl? You sure can!! Pour on a thin layer of Table Top Pro epoxy, tinted with brown acrylic paint, over your first layer of leaves. You do NOT want the epoxy to be completely opaque brown, just add enough paint to slightly tint it so you can still see the leaves through the epoxy. Let this layer cure while working on the next step. *Make sure to sand the cured epoxy between EACH layer throughout this entire project. This step ensures that the epoxy layers will adhere to each other.*

Step 3: Painting the vinyl leaf Stickers

Using your Cricut, cut out multiple 12”x12” sheets of vinyl leaves. With the help of your weeding tools, peel off the excess vinyl background leaving your cut leaves and the backing intact. Let’s PAINT! Use a dry sea sponge to pounce on your variety of acrylic paint colors. Don’t worry about getting messy or going outside the lines, that’s all part of the fun! Keep dabbing the paint with the sponge and pouncing brush to blend the colors until you are satisfied with the look. After painting a few leaves, run a toothpick along the border of the sticker to create a clean edge. Let leaves dry completely before moving on.

Step 4: Layering leaves

Peel and stick the painted leaves on the wreath. This will be the first out of two painted leaf layers. Flip the wreath over to slice off the excess vinyl. Using a gold paint pen, draw on the veins to give the painted leaves more life and detail. When you’re happy with the design, pour on another thin layer of brown tinted epoxy. Let this layer cure completely and add another layer of painted leaves. Don’t forget to trim the excess vinyl and draw the veining.

Step 5: Metallic bow background

Using a gold metallic vinyl, cover the entire bow portion of the wreath. Cut off the excess vinyl so you have a nice and clean edge.

Step 6: Paint the perfect boarder

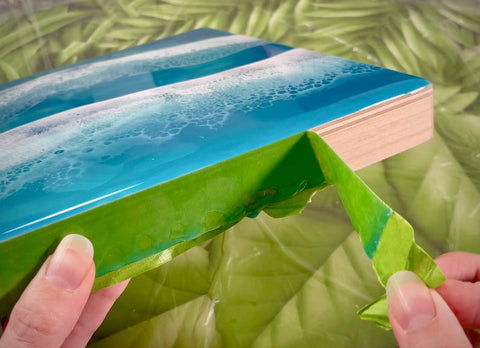
Carefully remove the painter’s tape from the edge of the wreath. Warming up the epoxy with a heat gun will help with an easy tape removal. Sand off any sharp edges and brush off the dust with a clean rag or large paint brush. Flip the panel over to mask off the back of the wreath and flip it over again to cut off the excess tape. For extra leak protection, brush on a thin layer of varnish where the tape meets the panel. Once dry, carefully paint the boarder of the wreath with a chocolate brown acrylic paint. I had to apply two layers for an opaque finish. After your paint has dried completely, brush off the panel with a clean dry rag to remove any dust. Pour on the final layer of clear Table Top Pro epoxy resin and let cure for at least 24 hours before moving on to the next step.

Step 7: Finishing the back of the wreath

Here at MAS Epoxies we love easy epoxy wood projects but we don't always love sanding resin drips. Since the back of the fall wreath was taped, we don't have to stress! Carefully heat the cured epoxy/tape with a heat gun and peel the tape off the back of the wreath. Use a palm sander to sand off any imperfections and to smooth down any sharp spots. This would be the perfect time to attach a saw tooth hanger or any other hardware that would work with your piece.

Step 8: Creating the perfect burlap bow

For this project I used four pieces of a burlap like ribbon. I had one long strip (20”), two medium strips (13” each) and one small strip (5”). Fold the 20” strip in half to form a large loop, secure the ends together with hot glue. I used an old pencil to press the ends together so I didn’t burn my fingers. Fold the 13” in half to form a medium loops and secure the ends with hot glue. Set the two loops aside and fold the 5” in half length wise to form a short, skinny tube shape and glue the sides together. Flatten the 20” and 15” loops, and stack them with the smaller loop on top. Make a small accordion fold and tie them together with wire. Take the unused 15” strip and create an accordion fold in the center. Attach this strip to the bottom of the bow with wire to create the tails. Wrap the tiny 5” tube around the center of the bow and between the tails; secure this with your hot glue and/or gorilla glue. Once you are happy with the shape, adhere the burlap bow to the wreath with hot glue. I also cut a little v into each tail of the bow and added a bit of glue to seal the edges. After that…YOU’RE DONE!!


Don’t forget to sign your beautiful vinyl and epoxy resin artwork!

For this step, I used a paint pen to sign the back of the piece. If you felt inspired by this fall epoxy decor tutorial to create a wreath of your own, please post and tag @masepoxies #masepoxies on Instagram for a chance to be featured! We love seeing you explore new ways to resin! Stay creative and happy crafting!

Thank you for joining us on this festively fall resin decor adventure! To get started on your own leafy piece, check out the MAS Table Top Pro system used in this tutorial!