null
Skip to main content

Guide to Resin Painting with Kim Weber

Aug 9th 2023

Resin Painting 101


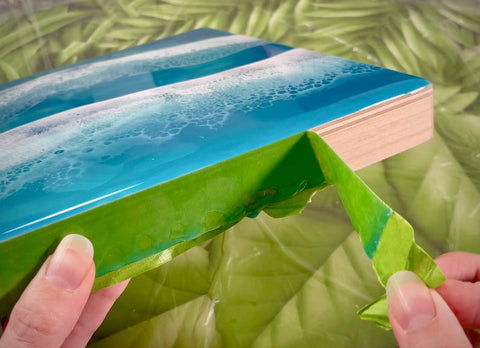
Interested in painting with resin but not sure where to start? We get it. Starting a new project can be intimidating. But fear not! Kim Weber has a full step-by-step list of what you need to know to create your very own stunning resin paintings like these "Jade Minis"!


Here's A Little More About Kim!


Meet Kim, the Los Angeles based fine artist creating masterful works of art! Kim is passionate about her craft and specializes in crafting unique resin paintings, innovative NFT art, and luxurious jewlery that dazzles. Her vivid colors and intricate designs can only be found with a talented eye like hers. From fashion-forward pieces to modern artwork with an old soul, Kim's work brings together elements of traditional fine art and modern expressionism for stunning creations. Experience her captivating work firsthand--you won't find anything else like it!


Use Code: KIMROSE for 10% Off + Free Shipping!

Materials List

  • Measuring cups/buckets
  • Wood mixing sticks
  • Plastic tarp
  • Propane torch or heat gun
  • Wood board canvas
  • Paint (acrylic works great but you can use most anything)
  • Art Pro Resin

Art Pro Epoxy


Table Top Pro Epoxy for epoxy resin table
Sold out


Sold out


Sold out

Check Out Kim's Video Tutorial!


Painting with Resin


Step 1: Canvas

Your canvas must be hard, not soft like a cloth canvas. I recommend a wood board canvas, they are affordable and light.

Step 2: Prep

I use a plastic tarp to cover the space and plastic cups to prop up the canvas. Resin doesn’t stick to the plastic, so you can reuse these as many times as you’d like.

Prep your cups, sticks, and any paints you’d like to use. You can add paint to the resin for color, or paint with clear resin over an existing piece. I absolutely recommend using small test samples before painting on an actual project.

For temperature, it MUST be 70-80 degrees Fahrenheit.

Step 3: Measure

Calculate how much resin you need using the Resin Calculator.

I use 0.98 thickness for a thick coat with minimal drippage

Step 4: Protection

Put on gloves and a respirator. For the gloves, work as clean as possible. For respirators: use a NIOSH-approved respirator.

Step 5: Paint

Pour 1 part resin and 1 part hardener. Hand mix for 5 minutes, then pour into a second separate container and continue to mix to the 9-minute mark. Use a wood stick to pick out any hairs or specks that have landed in the piece.

Step 6: Heat

At the 35 minute mark, use a propane torch or heat gun to pop all the bubbles. If you don’t do it enough, there will be bubbles. If you do it too much, you can burn the resin or cause more bubbles. Practice makes perfect.

Step 7: Cover

I recommend covering the piece, an upside down cardboard box works great for this.

Let sit for 24hrs before moving & 2 weeks before shipping. Remember to be patient when learning a new skill & practice makes perfect!