null
Skip to main content

Kelly Tries It: Making Ocean Epoxy Hearts with Jessica Moss

May 16th 2021

How to Make Ocean Epoxy Art Inspired by Not Too Shabby by Jess

Have you ever wondered how to use epoxy, how to add color to epoxy resin, or even how to create ocean waves in your resin art? If you answered yes to any of those questions, this step-by-step tutorial is for you! Follow along as we walk you through exactly what you need for resin painting, and give you the inside scoop on creating beautiful, DIY ocean inspired resin art.

What is Kelly Tries it?

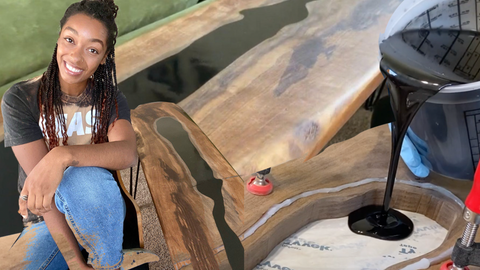
We are so excited to introduce to you our brand-new content series called Kelly Tries It!  In this series we’re going to be participating in creative, cross craft collaborations with amazing makers.  Our goal is to learn from each other, think outside of the box, inspire and educate. Our first featured maker is Jessica Moss from NotTooShabbyByJess! She was generous enough to hop on a Zoom call and fill us in on all of her insider tips and tricks. Read on to find out more about this talented artist! 


Jessica has always been drawn to the ocean, and when she saw resin ocean art for the first time, she knew she had to try it. She started this resin journey over a year ago and enjoys every minute of the creative process. She really wants to be a resource to the maker community, and even has a Tip Tuesday where she shows you how to create beautiful resin art. Jessica makes sure that her Instagram and TikTok pages are a positive, happy, and knowledgeable place for the maker community.

Resin Art Supplies

  • Table Top Pro epoxy
  • Sculpted Panels 10” flat heart panel
  • Frogtape painter’s tape
  • Brush on varnish
  • Artist’s Loft assorted acrylic paints
  • Black craft sand
  • Golden fluid acrylic paints: Turquois Phthalo, Cobalt Turquois, and Teal
  • Castin’ Craft opaque white pigment concentrate
  • Culinary torch and heat gun
  • Palm sander and sponge sander
  • Mixing cups
  • Mixing sticks
  • Gloves
  • Paper towels
  • Plastic to protect your work surface

Full Tutorial

Step 1: Prepping the Panel

Using your favorite brand of painter’s tape, mask off the edges and back of the panel. For a leak proof seal, brush on a small amount of varnish along the seam where the tape meets the surface of the MDF panel. Since the MDF is brown in color, brighten it up with a base coat of acrylic paint. I used multiple shades of teal, blue and white to create a gradient effect. Let the paint dry completely before moving on to the next step.


Step 2: Adding Color to the Epoxy Resin

For the “ocean” portion of this project I used three shades of fluid acrylic to tint the MAS Epoxies Table Top Pro epoxy system. I used about 10 ounces of epoxy (5oz resin/ 5oz hardener) per layer. To find out how much epoxy you will need for your project, check out our Epoxy Resin Calculator. I used just a drop of the acrylic paint since I wanted the colored epoxy to be semi-transparent. For the white waves, I used two good squirts of Castin’ Craft white pigment. When mixing, the white pigmented epoxy should be completely opaque on your popsicle stick. If you can still see the popsicle stick through the colored epoxy, slowly add more pigment and mix until you can no longer see the stick. For the black sand, pour in a small amount of clear epoxy and stir. The sand mixture should feel like a thick, gooey paste.

Step 3: Let’s Play with Some Sand

Let’s start this layer off with our black sand and epoxy mixture. Scoop the sand onto the surface of the panel and spread using a popsicle stick. Push the sand around until you have the desired look. Pop any bubbles with a heat gun or torch. I wanted my sand to look less “wet”, so I sprinkled some dry sand (no resin added) onto the sand and epoxy mixture. Make sure to sweep the excess sand away before continuing.


Step 4: First Layer of the Resin Ocean Waves

Starting with your darkest tinted shade of epoxy, pour a thin layer on the top section of the heart. Use the popsicle stick to spread the epoxy and then add your next shades of epoxy, ending with your lightest shade closest to the sand. Blend the layers so there are no harsh lines where the colors meet. Next, add a bit of clear epoxy to the area where your first wave will be (this can help with the lacing). Pour your white pigmented epoxy where you want the wave and gently start blowing out the pigment with your heat gun. Use slow, gentle motions with your heat gun and do not hold the heat in one place for very long. Once you have blown the wave out to the desired distance, grab your torch and sweep the heat across the waves to bring out the cells and lacing pattern.


Step 5: Prepping the Cured Resin

Since I waited 24 hours before adding my next layer of epoxy, we need to prep the surface before pouring. Using a medium grit sponge sander, scuff the cured epoxy ocean and wipe clean with a soft rag. This will give the cured epoxy layer some tooth for the next layer to adhere to.


Step 6: Let's Make Waves

To add depth to your DIY ocean inspired resin art, continue steps 4-5 until you are satisfied with the over all look. For this project, I poured 4 separate layers of ocean waves for maximum ocean vibes. Let your final wave layer cure completely before moving on to the next step.


Step 7: Finishing Touches

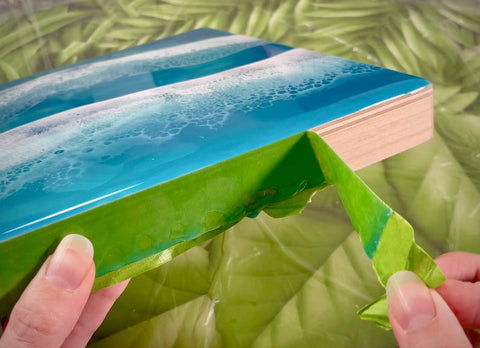
Using a heat fun to soften the epoxy along the edges of the panel, carefully peel away all of the tape. With a palm sander, sand the small lip of epoxy that hangs over the edge of the panel and smooth out any rough spots along the edges near the sand. Add painter’s tape to the back of the panel and cut off any access with a craft knife. Mix up a batch of clear epoxy to seal in your beautiful ocean waves and add a gorgeous shine to the edges of your ocean beach resin art piece. Make sure to pop any bubbles with a torch and let cure fully. Finally, it’s time to remove the tape from the back of the panel and sand any rough spots if needed.


Final Thoughts:

Don’t forget to sign your resin painting! I used a wood burning tool to burn my signature into the back of the panel. If you felt inspired by this resin beach tutorial to create a painting of your own, please post and tag @masepoxies #masepoxies on Instagram for a chance to be featured! We love seeing you explore new ways to resin! Stay creative and happy crafting!

 Thank you for joining us on this beachy adventure!

To get started on your own epoxy resin ocean art piece, check out the MAS Table Top Pro system used in this tutorial!