null
Skip to main content

Sculpted Epoxy Credenza with James Payne

May 5th 2022

Learn A New Creative Technique Today!


This DIY credenza by James Payne from @James_Payne_Woodworking_ is sure to give you a ton of inspiration for your next project! In this blog post, James will walk you through how he created this one of a kind piece by using a new and creative technique to give texture and design to epoxy! Keep reading to find out more!


Here's A Little More About James!


My whole life, I have been searching for knowledge to make me happy and I've been jumping from one type of activity to the next like a lost soul looking for Heaven. Whether it be metal work, as a tool and die maker, or a weekend woodworker, my activities have changed like the sands of Egypt. For example, I went from trading stocks, to golfing, to working out 7 days a week while taking in 10k calories a day! Yes, I do not recommend the latter item, but I can tell you that I did (at that time) achieve my healthiest shape and strength I had ever been in my entire life. Though I still do some of these activities, my day job and woodworking are the top two activities, at the moment.


Use Code: JAMES for 10% Off + Free Shipping!


Table Top Pro Epoxy for epoxy resin table
Sold out

Sold out

Supplies Used:

  • Festool Domino
  • Onefinity CNC
  • Table Saw
  • Router
  • Chop saw
  • Drill
  • Drill press
  • Bandsaw
  • Odies Oil
  • 3M 77 glue
  • Wood clamps

Check Out James' Full Video Tutorial!


Let's Build a Credenza!


As I progressed as a woodworker and my skills increased, I was drawn to the look of the mid-century modern credenza. At the time when I was thinking of building one, I was highly influenced by Jory Brigham's design and was also working a lot with MAS Epoxies' resin. In several of my art and woodworking builds, I enjoyed giving them an organic, sculpted texture. Also, at the time I was trying to sculpt epoxy without having to grind it, by using pre-ground molds and seeing what types of mold release products (waxes, silicone, and other products) I could use to best achieve my goal of mold sculpting epoxy.


When I finally came up with the door design I wanted, I realized that I had to either have someone design it or design the case myself. I had reached out to a great designer, but he was booked and unavailable. Luck turned its head my way when the credenza design, that I have always loved, came up on the Wood Whisper's Guild! I quickly purchased the plans and would add some of my own details to it. So, let's begin!!


I started by carefully planing and jointing the rough lumber to keep the book matched look of the slabs. By doing so, the case would have a unique look. I then cut the waterfall edges, to give a continuous grain flow over the edge. Once this was completed, I repaired any voids, knots, and cracks with MAS Epoxies Crackzilla. After it cured, I sanded it all to grit, and then made the dividers.


With all of the dado and rabbets work done for the sliding door, dividers, and back panel, I then cut dominos in the waterfall edges to help with alignment when the glue up begins. Yes, here comes the stressful part... the dreaded glue up, where anything can go wrong! In the end, it was not nearly that stressful, with the helpful hand from my wife and daughter, it went quite well.


Now, I bet you’re thinking that things were proceeding way too smoothly? Well, you'd be right! Little did I know, we would get a huge snowstorm in Tennessee that would give me a few extra days off work to continue working on the base (talk about good luck)! So, with the extra days off, I created a program to cut the leg templates on my CNC. After the leg templates were cut, I used them to lay out which lumber pieces I wanted to use, keeping a close eye on grain selection.

Next, I rough cut each piece on the bandsaw and would then double stick tape the template onto it and router it with a flush trim bit on my shaper. Once that was completed, I joined all pieces together with dominos. I then completed finish routing on the last template, making sure both legs were symmetrical. After that, I set up my sliding table saw to cut the angles on the legs, hiding any sign of end grain. Finally, I sanded all of it to grit.


With the legs shaped, I moved on to making the stretchers to connect the legs together. As before, I selected my grain and milled the lumber and cut the needed recess for the brass risers that join the base to the case. With the base and case completed, I moved onto the final sanding and added finish. For this project I used Odies Oil, as my finish since it is easy to apply and non-toxic.


The next step was to move on to milling the drawer fronts and cases. I continued the book-matched look onto the drawer fronts to mimic the case and to give it a cohesive look. With the drawers being made of solid walnut, I veneered the drawer bottoms with walnut, and also book-matched them to continue the unique design. With all pieces glued and sanded, I applied several light coats of shellac to hold up to any abuse the drawers will receive, while applying Odies Oil to the drawer fronts to match the case and legs.

When the finish cured, I installed the push-to-open and soft-close drawer slides to give the drawer faces a clean, no-handle look.


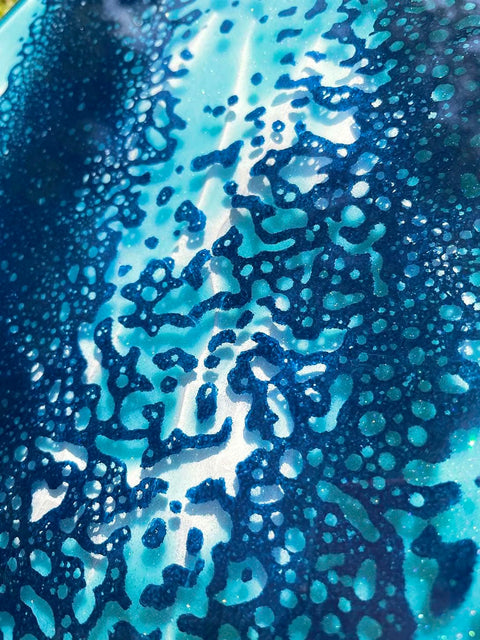
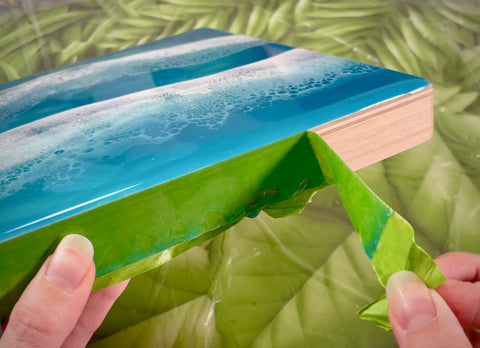
With everything built, it was time to add the resin details. After completing a test piece to see if my dream was even feasible, I jumped right in... even though the test was not a full success. To start, I built the door casework to an oversize shape as to trim it down after the resin insert was joined to it. Then, it was time to glue two pieces of ¾" MDF together and shape the design by grinding and sanding out the shape I wanted the resin to become. After sanding, I then cut a shower curtain larger than the MDF form. I used 3M 77 spray glue to attach the shower curtain to the textured MDF. I then pressed the shower curtain down to the MDF, starting from the center to the outside edges, trying to keep it as smooth as possible. I then trimmed the excess with a scalpel and added sides that had tuck tape on them. I finished the form up by caulking the sides.


From this point, it was a matter of trying to get the color-match correct to compliment and blend with the colors in the original oil painting that is placed on the wall above the area that the credenza would be located. For this, I used MAS Epoxies Deep Pour Epoxy Resin and Mixol tints to achieve the look I was going for. What will blow your mind is the color at the pour versus the color after it cured, which I had expected from my previous test piece.


From this point on, it was time to flatten the face to give me a surface to reference from. As I thought, I still had some clean-up to do on the back side, so I ground and sanded any wrinkles out, then coated it with MAS Epoxies Table Top Pro. I then trimmed to size and cut the tongue on the edges to be fitted in the groves on the outside walnut frame pieces. Once that was completed, I used MAS Epoxies Gluzilla and wood glue to assemble the sliding door components together.


Getting close to the end now! To finish off the door, I cut it to size to fit the case opening, sanded, and cut the recesses for hardware with a template and flush trim bit, in a router. Last, was to cut the door handle on the CNC and chisel the round corners square, which would get a piece of brass inserted into the cut out and glued in with MAS Epoxies Flag resin and Medium hardener. After it cured, I then applied Odies Oil to it. Once the finish cured, it was time to pour the flood coat of MAS Epoxies Art Pro on the face.


Finally, it was time to install the door and sit back and enjoy my dream!