null
Skip to main content

Custom Epoxy Countertop with Sculpted Panels

Nov 5th 2021

Countertop Concept

We were asked to help build a custom kitchen countertop for a company's lunchroom located in Pennsylvania. The dimensions were 92.25" x 25" x2" and we collaborated with Sculpted Panels to create a one of a kind design that differentiates from traditional epoxy countertops. Sculpted Panels offers a variety of patterns that are CNC'd into MDF board in many different sizes. We headed to their facility to pick out a large piece of their "Water" pattern and had it cut to the exact dimensions. Check out the article below or watch the YouTube video to see the process of creating a unique kitchen countertop.


Sculpted Panel Surge Pattern


We chose the "Water" pattern and had it cut to 92.25" x 25" x 2" which were the exact dimensions of the countertop space.

Paint Surface


Applied grey paint to the surface and sides of the panel. This base coat matched the cabinets of the kitchen it will be installed in.

Moisture Resistant Seal Coat to Bottom


Using LV Resin and Fast Hardener, we applied a base coat to the bottom side that will provide a waterproof barrier and prevent the MDF from moving. Mix LV Resin and Fast Hardener at a 2:1 mix ratio and provides a fast curing seal coat that has a working time of 10-15 minutes at 70F.

Make Form  


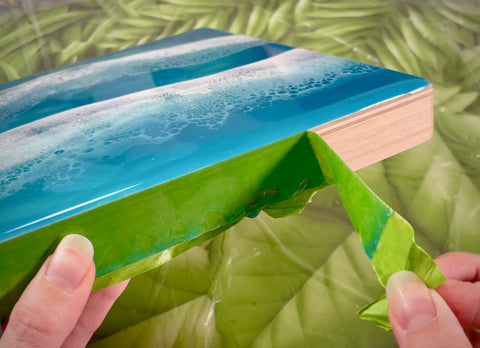
Using cardboard and sheathing tape, we made a form to attach to the edges of the panel that will keep the epoxy from leaking out once poured. The epoxy will not bond to the tape and will act as a dam to build up layers of epoxy.


Base Coat of Epoxy with Color


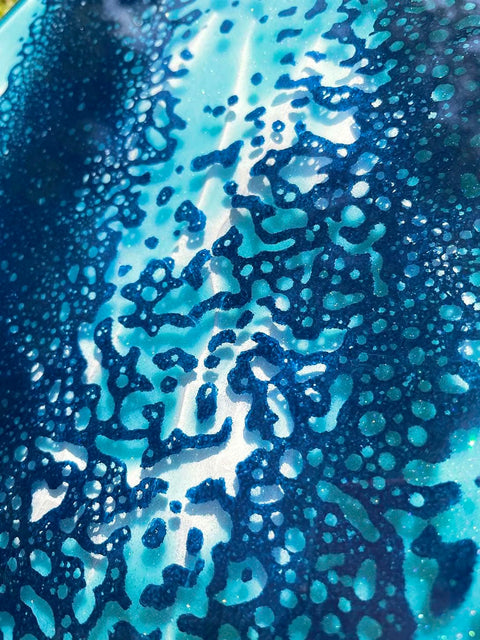
Using FLAG Resin and Slow Hardener at a 2:1 mix ratio, we mixed up 128 ounces of epoxy and added a few drops of Black translucent dye and Silver Mixol. Once epoxy was thoroughly mixed we poured the epoxy onto the surface and spread it around by hand. The colored epoxy will fill in the low spots of the sculpted panel that produces a cool 3D effect. FLAG Resin and Slow Hardener provides a 30 minute working time at 70F. Once the epoxy was thoroughly spread onto the surface, we used a propane torch to eliminate the surface bubbles. After two hours of the base coat setting up, we are able to apply the next coat without having to sand since the epoxy is still tacky.


Apply Clear Coat


While the base coat is still tacky, we mixed up 128 ounces of Art Pro for the second layer. Art Pro provides a 60 minute working time at 70F and has UV inhibitors that reduces the amount of yellowing over time. After mixing thoroughly with the proper 1:1 mix ratio, we applied the epoxy onto the surface and spread by hand. Once epoxy was spread evenly, we release surface bubbles using a propane torch. This process was repeated twice so the epoxy was completely level.


Remove Barrier and Sand Surface


Once the epoxy is cured, we removed the barrier and sanded the edges and surface with 120 grit. Removed any resin drips on the bottom using a chisel and sanding the bottom side. After sanding, wipe the surface clean with denatured alcohol with a clean rag prior to the final flood coat of epoxy.


Apply Final Flood Coat


Using Table Top Pro Epoxy, we mixed 1 gallon thoroughly at the proper 1:1 mix ratio. Applied to the surface and spread evenly by hand and a notched trowel. Once the epoxy begins to self level, we use our gloved hand or foam brush to tip the edges with epoxy for a nice glossy coating. After epoxy is covered onto surface we release surface bubbles using our propane torch. Let the epoxy cure for 7 days prior to shipping to the facility in Pennsylvania for installation.


Installers cut out where the sink needed to be placed and secured countertop over the cabinets. Overall, this was a very fun and unique project to make that puts a twist on traditional epoxy countertops.