
Supplies You'll Need:
- MAS Epoxies 18x12x4 Silicone Tray Mold
- MAS Epoxies Table Top Pro (We used 108 oz total)
- MAS Epoxies Penetrating Epoxy
- MAS Epoxies mixing cups, mixing sticks, and plastic spreader
- Color Creator mica powder, alcohol ink, and glitter
- Wood slab
- Pressed/dried flowers and leaves
- Tray handles
- Torch or heat gun
- Bosch palm sander and drill
Watch the Video Tutorial
Step 1: Sealing the Wood Slab
Get ready to start crafting with epoxy resin and wood - but don't "dive in" without the right preparation! Before you begin, it's important to seal your slab using MAS Epoxies Penetrating System. This will help ensure that when you combine those two materials, pesky bubbles won't pop up and ruin all your hard work.
Step 2: Adding the Base Layer of Epoxy Resin
Ready to fill the mold and add a touch of color? With Table Top Pro, you can start pouring that first layer! This system is perfect for those who want easy setup with more steps completed in one day. The mix ratio is 1:1 and it has an impressive working time at 30 minutes - plus, every 4 hours allows ample time to recoat, so your project won't take forever to finish.
After measuring, mix MAS Epoxies Table Top Pro according to the package directions. Pour in equal parts resin and hardener into a mixing cup. Stir the mixture together SLOWLY with a stir stick for about 2-3 minutes (we recommend setting a timer). If the resin still has streaks through it, keep mixing until it becomes clear.
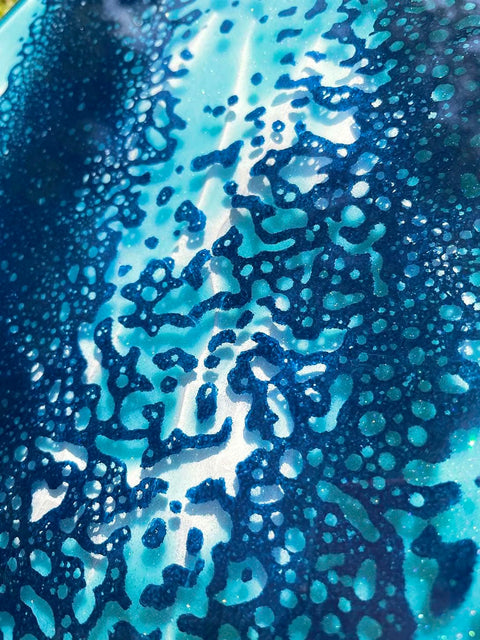
The first layer will be the darkest, and most opaque layer of the whole piece. To get this midnight forest vibe, mix Color Creator's silver metallic mica powder, black glitter, and black alcohol ink into the epoxy resin. Pour this mixture into your mold until it is about 1/8" deep.
If you would like your base layer to have a design, now is the time to run a popsicle stick through the epoxy to form a pattern of your choosing. (Note: This design will shift during the curing process.)

Step 2A: Muting the Design
After the first layer of epoxy has had enough time to solidify, mix up a new batch and give it some extra character with just a touch of black alcohol ink. Pour this unique blend onto your design for an eye-catching muted or blurred effect!


Step 3: Placing the Dried/Pressed Florals
Before the resin has had a chance to semi-harden, or turns tacky, get creative and place big and small flowers or leaves as a stunning backdrop - so they'll still be visible behind the top layer of florals. Once everything looks just right, give it time to cure completely before proceeding with the next steps.


Step 4: Adding Depth
To give this tray an extra dimensional look, let's create the illusion that there's a layer of florals further back. Mix up another batch of MAS Table Top Pro and carefully tint it with black alcohol ink for just the right amount of "smoked out" effect so you can still see all your lovely flowers and leaves through it!


Step 5: Last Floral Layer
After your previous coat of epoxy has had time to cure, it's time for the finishing touch! Mix up a layer of clear MAS Table Top Pro and pour onto your surface. If bubbles are present, don't worry - you can use either a heat gun or torch to get rid of them quickly. Once it reaches its gel-like consistency, add on those last florals and revel in the stunning result!
NOTE: Please be cautious when using heat near silicone molds! It can accidentally fuse the silicone to the resin and you won't notice until it's fully cured and you try to demold. So, use a light hand when it comes to heat! We recommend torching or heat gunning the middle of your project. Then, using isopropyl alcohol in a spray bottle, spritz the edges to pop the outer rim bubbles.


Step 6: The Flood Coat
Once your epoxy has cured for about 4 hours, add another layer of clear MAS Table Top Pro to level off the entire surface and cover the wood. Let this layer cure FULLY before moving on to the next step.


Step 7: Demolding and Sanding
Ready for the next step in your project? It's the most exciting one... time to demold! With MAS Epoxies reusable silicone tray mold, you won't have any trouble getting that beautiful piece out. Whether or not to sand it is up to you - if there are imperfections underneath or on top of your work then a light sanding with some fine-grit paper can help get rid of those and give even more shine when adding the final layer. Don't forget: make sure everything has had enough time to set before completing this last bit so it hardens properly!


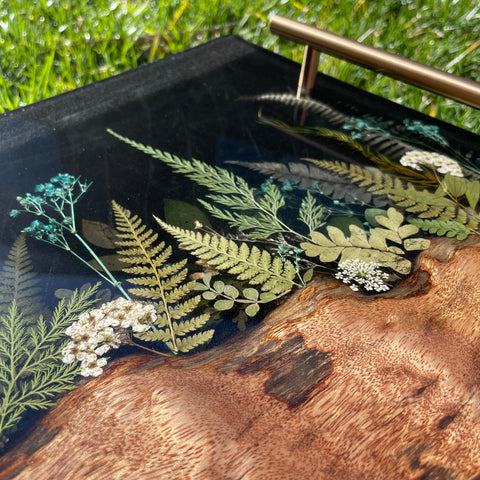
Step 8: Finishing Touches - Turn This Beauty Into a Gorgeous Wood and Resin Tray!
Ready to give your board a personal touch? Grab those handles, measure, and drill out the holes - then you can watch in delight as they completely pull together this beautiful masterpiece! To protect your table surfaces and tray bottom from scratches, little cork feet are added.
With these few simple steps, you can crafts an amazing and unique piece of art that is sure to be the talk of the town! Have fun creating something beautiful with your own personal spin. If it comes out as stunningly gorgeous as we expect it will, make sure to tag @masepoxies on Instagram so we can admire your work too - nothing like celebrating creativity together! We love seeing makers explore new ways to craft


Comments (0)
There are no comments for this article. Be the first one to leave a message!