Here is a list of common tips and techniques about MAS Table Top Pro Epoxy application process. Product information regarding cure time, surface preparation, hardness, mixing quantities and more. Therefore, making your experience with MAS Table Top Pro epoxy as easy as possible.
Personal Protective Equipment (PPE)
Nitrile gloves, Tyvek arm guards, and disposable aprons are some of the most common forms of personal protective equipment (PPE) employed to help to prevent skin contact with the epoxy resin and minimize risks of sensitization. Work in a well ventilated space or wear a National Institute for Occupational Safety and Health (NIOSH) approved respirator equipped with an organic vapors cartridge.
Temperature
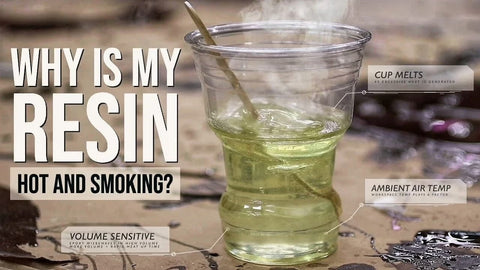
Epoxy is a temperature sensitive material. When cool, it’s thicker and sets slower. When warm, it’s thinner and sets faster. For best results, all materials and working conditions should be 70°F-80°F. When working in conditions or with material below 70°F, Table Top Pro may become to viscous to properly release air and self level. Working in conditions or with material above 80°F, Table Top Pro may set too quickly and exotherm, become too hot, which could cause it to yellow, distort or crack.
Coverage
Easiest way to calculate the correct amount of epoxy for coverage is using our Resin Calculator . Coverage can depend on any number of factors, most notably coating thickness, porosity of the surface and waste, but a 1 gallon kit (½ gallon of resin and a ½ gallon of hardener) should cover about 12 square feet in 1/8” thick flood coat. A ½ gallon kit (1 quart of resin and 1 quart of hardener) covers about 6 square feet in a 1/8” flood coat. 1 seal coat, followed by 1 flood coat is typical for application.
Surface Preparation
The surface must be clean, dry and free of contamination. Contaminates include, but are not limited to, the following: Dust, oil, moisture, sap, lint, and sanding debris. Do not use paper towels, dirty rags, contaminated sandpaper, or touch surface with oily fingers. Sand as needed and clean off sanding debris. Wipe surface down with a clean cotton t-shirt rag soaked in an oil free solvent like denatured alcohol prior to applying epoxy. Do not use tack cloth.
Bonding to Metal
When bonding to metal the surface must be bright and free of oxidation. Some metals can tarnish quickly so it is a good practice to apply the epoxy shortly after prepping the surface. Degreasing the surface with acetone, abrading with 80 grit sandpaper and degreasing again with acetone before applying epoxy is the simplest method to improve the epoxy to metal bond strength. Degreasing is a VERY important step and should be done even if the surface appears clean. Sanding might not be practical as this could scuff your diamond plate, so maybe just stick to degreasing with a clean cotton rag and acetone.
Mix Ratio
The mix ratio for the MAS Table Top Pro is 1 part resin to 1 part hardener (1A:1B) by volume, or 100 parts resin to 83 parts hardener (100A:83B) by weight. Using the recommended mix ratio is VERY important when using epoxy. DO NOT deviate in an attempt to speed up or slow down the gel time. An excess of resin or hardener will negatively affect the cure and could cause a wide range of short and/or long term problems with your epoxy coating.
Mixing Containers
Clear SOLO brand disposable cups made of polypropylene (resin code 5, PP) work quite great. If a large mass cures in them they can melt a little, but they do not dissolve in epoxy resin or hardener. Wax free paper cups and metal cans also work well. In addition, MAS Epoxy resins and hardeners are packaged in high density polyethylene (resin code 2, HDPE) containers, so most anything made of that should work well too. I would stay away from polystyrene containers (resin code 6, PS) as they melt under low temperatures.
Mixing Technique
Best practice is to combine resin and hardener at recommended mix ratio, mix 1-2 minutes while scraping sides and bottom of container until no streaks or striations, transfer to second container, mix 1-2 minutes again until fully blended, let sit for 1-2 minutes to allow air bubbles a chance to start rising to surface, and then use immediately. Take extra care not to whip in excess air. The whole mixing process shouldn’t take more than 5-6 minutes. If the mixed material starts to get warm, that’s your last warning the curing reaction is starting to take place and you need to get the epoxy poured onto your surface ASAP. Don’t mix more than one gallon at a time, instead step pour multiple batches for larger projects. Only mix up what you intend to immediately use.
Maximum Mixing Quantity
Do not mix more than one gallon at a time. For larger projects, step pour multiple pours. Only mix up what you intend to immediately use. For any knots or voids, make sure the bottom of the surface is taped so epoxy does not leak out of the bottom.
Working Time
Epoxy is a mass and temperature sensitive material. The gel time (time it takes the mixed epoxy resin and hardener to initially harden up) can vary drastically depending on any number of factors such as mixing mass, material temp, ambient temp, mixing time, speed of mixing, speed of application, coating thickness, etc. MAS Table Top has 30 minute gel time at 77F in a 150 gram mass, but will set up much faster if warmer or left sitting for an extended time in a larger mass. The more you mix up, and the warmer it is, the faster it will gel. That being said, 10-15 minutes is a rough average working time for a full kit at room temp. If the mixed epoxy starts to heat up in your mixing bucket, apply immediately.
Seal Coat
Always apply a seal coat before flood coating. To start, the surface must be clean, dry and free of contamination. Next, apply a thin coat of mixed epoxy to surface. Take care to cover and seal any voids or cracks present. Allow the seal coat to cure to a rock hard solid, and sand with 80-120 grit paper, paying special attention to imperfections such as air bubbles. Lastly, wipe clean with a cotton t-shirt rag and denatured alcohol. The purpose of a seal coat is minimize the effects of off gassing. The seal coat creates a thin air-tight barrier between a porous surface and the Table Top epoxy flood coat, so air bubbles can’t percolate up through the surface into the flood coat creating cosmetic defects.
Maximum Coating Thickness
Do not apply MAS Table Top Pro thicker than 1/8” – 1/4” per coat.
Pour and Spread
Pour mixed epoxy in a “S” shaped pattern on to surface. Using the plastic spreader or foam brush provided, spread epoxy over entire surface pushing epoxy to the edges. Do not apply thicker than 1/8”-1/4” per application.
Remove Bubbles
Let epoxy sit for 10 minutes to allow air bubbles to rise to the surface. Using a propane torch or a heat gun, apply heat 6-8 inches above the surface in a back and forth motion to remove bubbles. Be careful not to not over heat, scorch or burn the epoxy. Periodically check for additional bubbles and remove as need.
Overcoating and Recoating
The overcoat time can be as short as it takes the previous coat to achieve surface tack. When in doubt, use a cotton ball to test. If the epoxy is tacky enough to pull the hair off a cotton ball, you can recoat without additional surface prep or sanding all the way up until you can no longer indent a fingernail into the previous coat. That should be around 2-4 hours after pouring. Past that point you will want to lightly scuff sand between coats to promote adhesion. This also applies to recoating or touching up aged epoxy surfaces. As a general rule, if you can sand, you should sand. Keep in mind, warmer conditions and thicker coatings set up faster.
Step Pouring
The maximum casting depth of MAS Table Top Pro is 1/8” – 1/4” per pour, but deeper castings can be achieved by step pouring multiple layers. Each layer MUST be allowed to cool to room temperature (70-80°F) before adding additional layers. Once cooled, you can pour the next layer without additional surface prep all the way up until you can no longer indent a fingernail into the previous coat. No sanding necessary. That should be around 2-4 hours after pouring, but warmer temperatures will set faster, and cooler temperatures will set slower. Large batches of mixed epoxy will also cure much more quickly than small batches. Past that point you will want to lightly scuff sand between coats to promote adhesion. As a general rule, if you can sand, you should.
Coloring
To tint epoxy, simply use an epoxy compatible colorant and follow the manufacturer’s instructions. Typically you would add a small amount of the colorant into the resin or into the blended resin and hardener. 2-5% loading level should have no significant effect on cure. A wide range of colorants, pigments, dyes and tints are compatible with MAS Table Top Pro such as Gamblin Dry Pigments, One-Shot Lettering Enamels, K-Bond Color Pigments and most alkyd based paints. We’ve also had great success with Black Diamond powder mica pigments, both metallic and flat, to get a marbled or colored effect with the Table Top Pro epoxy. As with most projects, artwork especially so, each piece is unique. A quick small-scale colorant compatibly test is recommended to make sure it stays evenly dispersed and the epoxy cures properly. Pigmented epoxy may be somewhat more UV resistant than unfilled epoxy, but should still be protected with a UV resistant coating for outdoor use.
Stain Compatibility
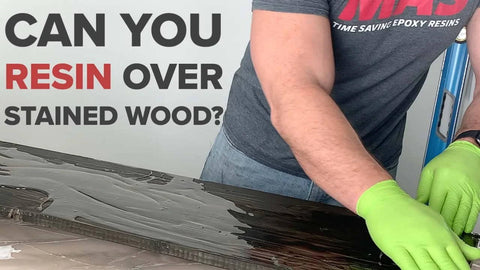
DO NOT apply oil based stains to surface prior to applying epoxy. Coating oil based stains with epoxy will result in surface imperfections and adhesion issues. We typically recommend using a water-based stain under the epoxy clear coat. Be sure the stain is fully dry before coating work with epoxy. It’s also a good idea to first test your stain for compatibility with epoxy using the cross hatch test: Apply the stain a scrap piece of wood. Let it dry. Apply the epoxy over the stain and let it sit overnight. Next day cut a tic-tac-toe image into the epoxy with a shop knife. Place a piece of Duct tape on each of the nine squares. Try to remove the epoxy. If it comes off easily without any wood chards then there is an adhesion problem and will not work, but if it comes off with bits of wood attached, the epoxy is penetrating the stain and will adhere well.
Image Media Compatibility
In our experience MAS Table Top Pro is compatible with most image and photo media, but the results can vary depending on the particular ink, paint, and/or paper being over-coated. As with most projects, artwork especially so, each piece is unique. We always recommend a running a small scale compatibly test to ensure the image won’t bleed.
Buffing and Polishing
An unconventional approach, but can be useful to remove small surface imperfections while maintaining high gloss finish or dull the high gloss look of an epoxy coating to a satin finish. To remove small surface imperfections and/or obtain a high gloss finish, wet sand using grits in smoother succession up to 2000 grit, then buff with NOVUS 3 Heavy Scratch Remover followed by NOVUS 2 Fine Scratch Remover, while changing pad and cleaning abrasives off between coats. For a satin finish, buff surface with Turtle Wax Polishing Compound, Light to Medium Cleaner, until you’ve reached the desired effect.
Outdoor Use and UV Protection
MAS Table Top Pro can be used for exterior projects and furniture, but like most consumer products, Table Top Pro is not UV stable. Generally speaking, epoxy resin tends to yellow and may chalk when exposed to direct sunlight for extended periods of time, which is why we recommend protecting epoxies with a UV protectant varnish or paint for outdoor use. Marine grade polyurethane varnishes like Bristol Finish UV Clear, with enhanced UV protection additives, offer improved UV stability and abrasion resistance over “off the shelf” spar varnishes available at your local hardware store.
River Tables
The max thickness MAS Table Top Pro should be applied is 1/8-1/4” per layer. We typically recommend using MAS Deep Pour epoxy for river tables where you can pour large amounts of epoxy up to 1-2” thick, and then using MAS Table Top Pro as the top coat. However, thicker coats and castings of Table Top Pro can be achieved by step pouring multiple layers. Each layer MUST be allowed to cool to room temperature (70-80°F) before adding additional layers. Use caution for very large pours. Pouring too thick and layering too quickly could cause the curing epoxy to heat up, yellow, distort or crack.
Cure Time
MAS Table Top Pro in a 1/8” thick coat at 77°F should be tack free in roughly 4 hrs, sandable after 8 hrs, and fully cured in 5-7 days. Keep in mind that epoxy is mass and temperature sensitive. Thin coats and cooler working conditions will cure slower, and thick coats and hotter working conditions will cure faster.
Hardness and Scratch Resistance
MAS Table Top Pro has a hardness rating of 82 Shore D, and is resistant to scuffing and scratching under normal table wear and tear conditions. However, it’s important to keep in mind that epoxy takes roughly 5-7 days at room temperature to fully cure and develop its full mechanical and thermal properties. Best practice to wait until epoxy is fully cured before putting into use. One of the great things about an epoxy table top finish is that if it does get damaged, it can easily be sanded and recoated.
Temperature Resistance
The heat deflection temperature (HDT) of MAS Table Top Pro is 124°F. We’ve also done extensive “hot coffee” cup testing up to 130°F on fully cured MAS Table Top Pro with no rings. As a general rule, anything that will burn you (hot pans, boiling water kettle, etc.) can potentially leave an impression on the surface. Best practice is to wait 5-7 days at room temperature for an epoxy surface to fully cure (develop it’s full mechanical and thermal properties) before putting it into service.
Shrinkage
Shrinkage is typically a non-factor, unless you exceed the max casting depth of 1/8-1/4”. Generally speaking, curing epoxy is an ectothermic reaction. If cured in too large a mass, epoxy will get to hot upon curing and could potentially distort or shrink.
Food Contact
To our knowledge, no manufacturer is selling a FDA approved epoxy resin (some manufacturers may claim “FDA complaint”, “meets FDA guidelines”, etc – this is not the same as FDA approval. These are largely marketing claims that have not necessarily been substantiated). That said, we have made many table/bar tops with our product and personally feel comfortable if the tabletop contacts food. We’re happy to provide our Product Safety Data Sheets to any buyers as well if more information is desired.
Fish Eye
Fish eyes are caused by surface contamination. Oil, wax, flecks of dust, sap, moisture, etc., even in small amounts, can cause surface imperfections in the coating. One way to fix fish eyes is by letting the epoxy cure fully, mix a small amount of table top epoxy and put it over the fisheye or “pitting” spots. This can also be done with clear super glue for a quicker fix. Fill the spot and let it fully cure, hand sand the spot that was just filled. Lightly sand the surface and apply another coat to level it out.
Imperfections
To remove imperfections, lightly sand the affected area with 120-220 grit sand paper, clean sanding debris and solvent wipe with a clean cotton rage soaked in denatured alcohol. Recoat the affected area with fresh dollop of MAS Table Top Pro to blend in with existing glossy surface. Mixed Table Top Pro resin/hardener blend can also be diluted with roughly 2-5% denatured alcohol to help reduce mixed viscosity and improve self leveling in the affected area.
VOC
MAS Table Top Pro is considered a 100% solids epoxy coating. While much of the industry will tell you their products contains zero VOC, we’ve actually tested our product and obtained a result of 1.5 g/L VOC, which is extremely low. For reference, a low VOC house paint may contain up to 50 g/L VOC and other VOC-exempt solvents.
Sensitization
Unfortunately, it’s possible to develop an allergic sensitization to any epoxy resin system. It is quite like the allergic reaction to poison ivy. The severity of the reaction varies depending on the individual and the amount of exposure. Some people become sensitized to the epoxy resin and others to the hardener. Take measures such as wearing nitrile gloves, Tyvek arm guards and an apron to prevent skin contact with the epoxy. If you do get some on your skin wash it off immediately with soap and water. It’s less common, but in addition to developing a rash from skin contact, severely sensitized individuals can also have an allergic reaction to vapors from the epoxy resin and hardener. Symptoms may include tightening of the throat and difficulty breathing. We recommend working in well ventilated areas for precisely that reason. If you must work with the epoxy resin in a confined space, wear a NIOSH approved respirator with an organic vapor cartridge.
Clean Up
Warm soapy water works well for hardeners. Denatured alcohol, Isopropyl alcohol or acetone work well for resins. Best to soak up and/or scrape off as much material as you can with some rags first and then clean the affected areas with one of the options listed above. Cured material cannot be removed with solvents. Must be sanded away.
Shelf Life and Storage
The shelf life of MAS epoxy resins and hardeners is at least one year in sealed containers, but the material can last much longer when stored between 60-90°F in a dry place. The product should be stored indoors, on a raised surface off the floor and away from exterior walls. Do not allow epoxy resins or hardeners to freeze during winter storage. After use, tightly reseal all containers. With age or when stored improperly, you may encounter issues such as crystallization of the epoxy resin or yellowing of the hardener. If there is any doubt about the condition of old material, we recommend mixing a small amount in a disposable cup to ensure it hardens before using it for a project.


Comments (0)
There are no comments for this article. Be the first one to leave a message!