At MAS Epoxies, we get asked how to build a an epoxy river table very often. So, we want to provide you with step by step instructions and video that shows you the process of building a live edge river table from start to finish. Keep reading for all the steps and materials needed to build your own live edge river table. You'll also find out what supplies you need to make a river table and how to make a river table mold.
River Table Mold Materials
- Melamine or MDF for Mold
- 1/2" Screws
- Clear Silicone (DAP)
- Standard 185mL Caulk Gun
- Sheathing Tape
- Scissors or Razorblade
- Power Drill
- Level
- Circular Saw
- Clamps
River Table Materials
- 1.5 Qt Kit of Penetrating Epoxy Sealer
- 4 Gallon Kit of Deep Pour Epoxy
- 1 Gallon Kit of Table Top Pro Epoxy
- Mixing Buckets, Sticks or Paddle Mixer
- Rubber Gloves
- Propane Blow Torch
- Random Orbital Sander
- 80-180 Grit Sandpaper
- Denatured Alcohol
Video Tutorial
1. Cut Wood and Mold Materials
Cut your live edge slab in half and measure the desired size of the mold for the slabs to fit. Using a sheet of 1/2″ Melamine, MDF or HDPE, cut the material to desired measurements of your river table. This piece is 42″x 20″x 1.5″. Remember always measure twice and cut once.


2. Assemble Mold
Here's how to make a resin table top mold. With your mold material cut, apply sheathing tape (available at local hardware stores) onto the inside surfaces of the mold. Make sure all sides of the mold are taped or the epoxy will bond to the mold. Using a power drill, attach all four borders of the mold to the base with 1″ screws. Once your mold is secured together, apply silicone to all inside seams and corners to ensure epoxy will not leak out of your mold.


3. Apply Penetrating Epoxy Sealer to Wood Slab
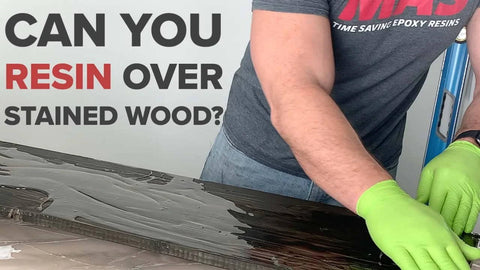
Using MAS Penetrating Epoxy sealer, mix two parts resin to one part hardener into a cup and stir for 2-3 minutes. Pour mixed epoxy onto the wood and coat all sides of the wood slab using a paint brush or by rubbing it into the wood by hand with rubber gloves on. This step will create a barrier that helps eliminate bubbles and foaming when epoxy comes in to contact with the wood. Once all sides are coated with epoxy, prop them up on plastic cups so the epoxied slab does not bond to your work space. Any type of plastic or silicone surface will work for this. Let epoxy cure overnight.

4. Sand Slab
Once Penetrating epoxy has cured, using your random orbital sander, sand down all edges with 80-180 grit paper and hand sand the live edge. The main focus of this should be making sure the top, side and bottom are flat and the live edge is lightly scuffed. Make sure all sanding debris is removed from wood slab prior to placing in to your mold.


5. Place Wood Slab in Mold
For this river table, we wanted to add color but not too much that it hides the beauty of the live edge slab and the unique character it has. Using Table Top Pro, we added two colors of pigment powder to get our desired color scheme which was a blue/grey color. To ensure that components don’t float during the first pour you can place weighted items on them or clamp them in place. This first layer of epoxy with pigment will also secure the slabs in place once it starts to cure so we did not need to clamp, screw or silicone the slab to the mold.

6. Pour First Layer With Pigment
Measure Table Top Pro using the correct 1:1 mix ratio and add approximately 2 tsp of color per cup, mix epoxy resin for 5 minutes. DO NOT pour over 1/4″ of epoxy on this step. Keep in mind, if you are mixing with a drill attachment the faster the mixer spins the more air bubbles you will whip into the mix. Use a controlled speed when mixing and keep your mixing blade below the surface as much as possible. Once epoxy is mixed, let it sit in the cup for 5-10 minutes to allow air bubbles to rise to the surface.
Pour epoxy into the channel of the mold and wait 10-15 minutes. Using a propane torch, apply heat 6 inches above the surface in a slow waving motion to release air bubbles. After you torch you can start to create your own pattern using a mixing stick to swirl the epoxy. This is the fun part and you can create a interesting pattern for you base layer. Repeat this process for the first 30 minutes until the epoxy starts to gel. Once the epoxy has a syrup like consistency, swirl and apply heat one final time and cover your piece to keep off any dust from settling. It’s good to know that we use Table Top Pro for this step because of it’s faster gel time. If you attempt to do this step with Deep Pour the pigment will settle to the bottom during the longer curing process.

7. Mix Deep Pour Epoxy and Apply
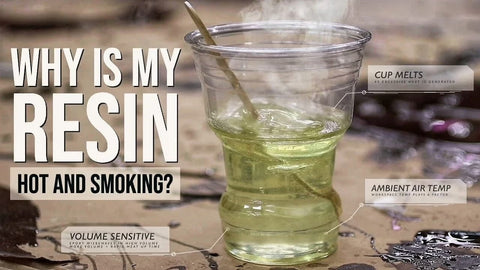
Once the base layer of Table Top Epoxy has set for approximately 12 hrs, you are ready to apply Deep Pour Epoxy over the first layer. Measure the dimensions of the river channel that needs to be poured and use our handy Resin Calculator to tell you the amount of epoxy you will need for this layer. We mixed a full 1.3 gallon kit of Deep Pour epoxy and poured into the river channel at .5″ thick. Remember that Deep Pour epoxy is mass and temperature sensitive so the more you mix at warmer temperatures the faster it will cure (and possibly lead to negative effects like bubbling, yellowing or cracking). Deep Pour is considered a river pour epoxy because of these characteristics.
The mold was 42″ long and 20″ wide. However, the live edge width between the slabs varied from 6″ to 20″. Pouring at .5″ in 70F working conditions will let the epoxy cure properly and not overheat which could cause shrinking, yellowing and cracking. After 12 hrs we applied the last .5″ of Deep Pour on top of this layer. Since the epoxy was poured in two .5″ layers within 12 hrs of each other, the layers bond together providing a 1″ thick casting with out any layer lines.

8. Disassemble Mold
Once epoxy has fully cured after 24 hrs you can start to take apart the mold. Using your power drill, remove screws from all sides of the form. Next, using a mallet or hammer tap the inside edge of the mold to release the edges. Once all sides are removed you will need to remove the base from the table. Using a chisel or wedge, place the edge in between the epoxy and mold and tap the handle to separate the table from the bottom. Continue to do this on all sides until the table releases from the mold.

9. Sand River Table
Now that we have the river table demolded, the next step is to sand all sides of the table. Using a random orbital sander with 80 grit sand paper, sand down the surface and edges of the table. Once you have sanded the surface completely, wipe the surface down with denatured alcohol and a clean rag. Using an air compressor helps blow off any small dust particles to ensure a clean surface.
For this table we went a step further and used a hand planer for the sides to remove any tape or silicone marks. This made the sanding process much easier but if you don’t have access to a hand planer, sanding will work fine it will just take a little more time. We also routed the top edges to give a beveled look to the table.

10. Clean Surface for Final Top Coat
With a clean rag, wipe surface down with Denatured Alcohol. Be sure to wipe all sides down for a clean surface. Blowing off the surface one final time with an air compressor can ensure the surface is completely dust free.

11. Apply Final Coat of Table Top Pro
Using our handy Resin Calculator, enter the dimensions of the surface with a 1/8″ coating and the calculator will tell you how much epoxy you will need to mix up. Once you have the amount you need, mix Table Top Epoxy at the 1:1 mix ratio by volume.
One tip that helps the mixing step is warming up the Part A Resin bottle for about 5 minutes. You can put the sealed bottle under hot water and this will help the clarity and reduce the amount of air bubbles while mixing. DO NOT warm up both Part A and Part B. If you’re working at a temperature below 70 degrees F and the material is below 70 degrees F this step is very helpful.
Once you have your epoxy measured out, you can begin mixing with a power drill or mixing stick for 5 minutes. Once the epoxy is fully mixed you can let the epoxy sit for 5 minutes. You’ll notice the air bubbles will rise to the surface during this time, but watch for overheating as this is the point where the epoxy is most vulnerable to exotherm. After the epoxy has sat you can pour on to the surface and spread the epoxy to all the edges with a notched trowel or plastic spreader. When the epoxy is going over the edge, you can use your gloved finger to rub the epoxy along the edges. Let the epoxy self-level for 10 minutes after it is spread on the top of the surface. Once it is all even you can begin to apply heat using a propane torch or heat gun to release the air bubbles. Apply heat every 10 minutes for the first 30 minutes after the epoxy has leveled. Continue to rub the edges with your finger to eliminate drip marks during this time as well.

12. Let Your Epoxy Cure
Once you have eliminated the surface bubbles you can cover the table with a piece of cardboard or some sort of cover that will protect the piece from any dust settling on the epoxy while it cures. You do not want to have the cardboard or other material touch the epoxy so make sure there is enough space that the cover is elevated away from your epoxy. After 12 hrs the epoxy will be cured at 70F. The surface will be fully cured and ready for use after 7 days. DO NOT rest objects on it or use it until the 7 days has passed. This could result in rings from cups or scratches on the surface. Apply a base to the table and there you go. You made your own river table!


Comments (2)
Love the video! Just thinking about getting into live edge epoxy design.
After applying table top coat what do you apply to the underside of the table to prevent warping?