Properly mixing resin is a critical element of a successful pour. If you encountered resin that is soft or sticky or experienced micro-bubbles, improper mixing was the likely culprit. This guide will educate on proper techniques, understanding mix ratios and how to troubleshoot common mixing problems.
What is the Mix Ratio?
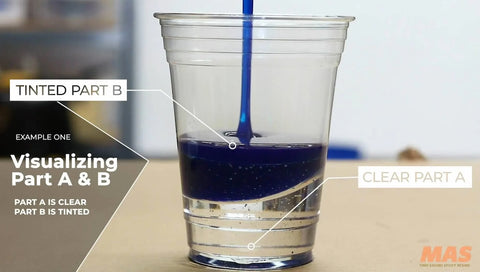
MAS Epoxies has a vast product line with a few different mix ratios. Knowing the ratio and accurately measuring is absolutely critical. Measuring resin by volume is the most common method. If you need help measuring by volume with pre-mark mixing cups check out The Easiest Way to Measure Epoxy Resin by Volume
With that said, measuring by weight is the most accurate. If you decide to mix by weight, keep in mind the density of the resin and the hardener is different. This means weight of the two will be different so the ratio will be different than by volume. Worry not! We made some cool epoxy resin calculators that can help mixing by volume or weight!
Factors to Consider
The amount of time you spend mixing can vary on the epoxy resin system you are using, the viscosity of the two components, the ambient air temperature and the epoxy resin temperature, as well as the volume of resin you are mixing. Mixing two parts together seems simple enough right?! Well, in reality there is a bit more to it so lets take a moment to explain why those variables play a factor.
1. Viscosity
Epoxy with low viscosity has a low resistance and flows quickly, tends to be a bit easier to mix and bubbles release more readily. It will penetrate into cracks and crevices with it’s reduced surface tension. High viscosity epoxies move sluggishly, have a heavier body which can sometimes trap air, but possess other properties that make it desirable. Uniform self-leveling and vertical edge adhesion are some of the benefits of a high viscosity resin.
2. Temperatures
70F-80F is the ideal working temperatures for epoxy resin. Every workspace is different so you will need to consider the air temperature as well as the material temperatures to get consistent results. Epoxy is a temperature sensitive material. When cool, it’s thicker and sets slower. When warm, it’s thinner and sets faster.
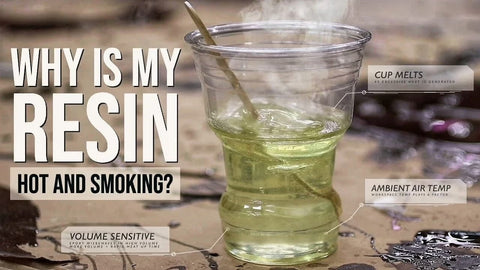
When working in conditions or with material below 70°F, some high viscosity resin may become too viscous to properly release air and self level. Working in conditions or with material above 80°F, most epoxies may set too quickly and exotherm which could cause it to yellow, distort or crack. To learn more about exothermic reactions check out Why is my Epoxy Resin Hot and Smoking?
A good rule of thumb, raising temperature 18°F (10°C) will cut your gel time in half. Conversely, decreasing temperature 18°F will double your working time, however if the temperature is too low you can stall out the chemical reaction. A similar rule applies to mixed viscosity. Raising material temperature 18°F will cut the mixed viscosity in half, while decreasing temperature by 18°F will double it.
What is the Best Way to Mix Epoxy Resin?
Now that we understand the viscosity and temperature factors, we can dive into the good mixing etiquette. Our preferred method is mixing by hand in a clear mixing container but some projects call for a large volume so hand mixing becomes too laborious.
Best Practice for Beginners | Hand Mixing
- Find a suitable size container. Use an appropriate sized cup so your epoxy only fills 3/4 of the way to the top.
- Combine resin and hardener at recommended mix ratio.
- Mix for 3-4 minutes while scraping sides and bottom of container until no streaks or striations.
- Transfer to second container mix 1-2 minutes again until fully blended
- Let sit for 1-2 minutes to allow air bubbles a chance to start rising to surface, and then use immediately.
Paddle Mixing with a Drill
We prefer Helix Style paddle mixers, the design reduces the amount of air that can be whipped into the resin.
In larger volumes, paddle mixers make short work mixing epoxy resin. It is important to MIX SLOW on the LOWEST SPEED setting on your drill
If you whip a lot of air in, it will turn white, milky or frothy. There is no way to recover that epoxy. The micro bubbles created have a very low density and will never be able to rise to the surface to burst regardless of what measures you take.
What Can I Mix Epoxy Resin In?
Clear SOLO brand disposable cups made of polypropylene (resin code 5, PP) work quite well. If a large mass cures in them they can melt a little, but they do not dissolve in epoxy resin or hardener.
Wax free paper cups and metal cans also work well. In addition, MAS Epoxy resins and hardeners are packaged in high density polyethylene (resin code 2, HDPE) containers, so most anything made of that should work well too.
Stay away from polystyrene containers (resin code 6, PS) as they melt under low temperatures.
Contending with Bubbles
- Temperature: Working in a shop or with material below 70F will cause the mixed epoxy to become too thick to properly release air and self level.
- Coating Thickness: Applying high viscosity resin thicker than the recommended 1/8”-1/4” maximum coating thickness will make it difficult to release air bubbles with heat gun or torch.
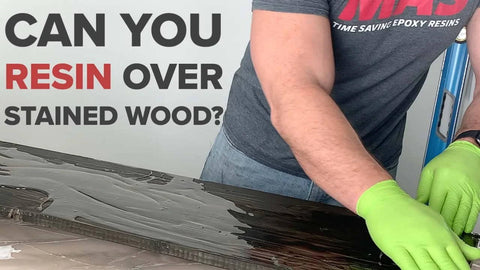
- Seal Coat: ALWAYS apply a seal coat to wooden surface before flood coating. Wood will off gas and percolate bubbles up through coating if you fail to do so.
- Mixing: Mixing too vigorously will whip in excessive air bubbles into the blended resin and hardener.
Epoxy Not Setting Up or Curing Properly
- Mix ratio: Double check the proper mix ratio was used.
- Resin and hardener: Make sure you used resin and hardener, and not all resin or all hardener.
- Fully mixed: Upon mixing, be sure to scrape sides and bottom of mixing container to ensure all resin and hardener are fully blended. Failing to do so can result in soft spots in coating.
- Pouring: NEVER scrape or brush the sides or bottom of the container you just mixed in to remove every last drop because no matter how thoroughly you may have mixed, there will always be an unmixed portion which can be dislodged and will leave a wet or sticky spot on your coating.
- Temperature: If the temp falls below 60°F while Table Top is initially setting up, it may stall out the chemical reaction needed to harden the epoxy. Increasing shop temp to 80°F+ for 24 hours may help to restart the chemical reaction and harden the epoxy coating.
For further information about epoxy resin not curing and how to remove it check out the article How to Remove Soft or Sticky Epoxy Resin.
Additional Video Resources


Comments (2)
We are Puyang Xintian Chemical Co Ltd, a professional manufacturer of Styrenated Phenol (Antioxidant SP), transparent colorless, widely used as a non-reactive diluent for solvent-less and high-solid coatings. Our product delivers exceptional efficiency in rubber, plastic, epoxy coatings, marine coatings, and epoxy flooring applications, serving as a reliable alternative to Kumanox 3111F.
Looking forward to supporting your projects.
Best regards,
Jornason
Puyang Xintian Chemical Co Ltd
Whatsapp: 86-15093229702
www.xtxchem.com
How much resin do I apply on small rock painting. Your help will be highly appreciated. Thanks